Showing posts with label Sauce. Show all posts

Thursday, March 9, 2017

Make-Ahead Alfredo Sauce


It's a Friday in Lent! Time for a meatless meal. I don't know about you, but I'm personally really burnt out with cooking. The kids really have me feeling defeated in the kitchen because every single thing I have cooked this week has been met with at least one of the following comments upon serving (and I quote): Blech! Yuck! Ewww! That's not my favorite! I don't want to eat that!

I swear I'm not a bad cook. My kids think I am though.


So tomorrow, I am doing something so simple and basic that the children are sure to not turn up their little noses. Alfredo sauce served over macaroni. Because that's really all Alfredo sauce is, right? Fancy cheese sauce. I could certainly dress the meal up by sauteeing some shrimp in a bit of butter and then tossing it together with the noodles and sauce OR roasting some vegetables with garlic and herbs and then throwing them into the noodles as well. But then the children certainly wouldn't eat it. And tomorrow I just want them to eat, to not complain, and then to go to bed on time so I can finally relax.


Thankfully, Elise posted this marvelous recipe for a Make-Ahead Alfredo Sauce. It can be prepared and then refrigerated for up to five days or frozen for even longer. I just whipped this up while I was already in the kitchen earlier in the week preparing a different meal and it is currently taking up shelf space in the fridge just waiting for its Friday evening debut for the children. I'm lucky there was some left to store. I kept eating it by the spoonful because it's pretty amazing. But what Alfredo Sauce isn't?!

I love how customizable this recipe can be. You can make a pretty pure Alfredo Sauce or you can branch out to create a luxurious, cheesy concoction more suitable for your tastes. Add Cheddar, Swiss, Gruyere, or a combination. Throw in some minced fresh herbs or dry mustard. Add some red pepper flakes or cayenne pepper to kick up the heat a bit. There are so many ways you can amp this recipe up. But the single best part is that it can be made ahead of time and then reheated in the microwave or on the stovetop for a quick, easy dinner. I'm in love.

Of course you do realize that the kids probably won't touch this either. If that's the case, I'm definitely adding some vegetables!


Make-Ahead Alfredo Sauce
from Simply Recipes

Note: This makes enough sauce for 16 ounces of pasta lightly dressed. If you like it a little cheesier, make a double batch!

1 1/2 cups whole milk, plus extra as needed
2 tablespoons unsalted butter
2 tablespoons all-purpose flour
1 to 1 1/2 cup grated Parmesan cheese (3 to 3 1/3 ounces)
Salt, to taste
Pepper, to taste

First, warm the milk in the microwave in 30-second increments on HIGH. The milk does not have to be boiling, just warm to the touch and a bit steamy. Set aside.

Make a roux by melting the butter in a heavy-bottomed saucepan over medium heat. Sprinkle the flour over top, then whisk together well. Continue to cook the roux, whisking constantly for 1 minute. The roux will begin to smell toasty and turn a golden hue.

Whisk in the warm milk by adding about 1/4 cup of the warm milk to the roux at a time. Never stop whisking. The roux will seize up into clumps and look terrible, but all will be well as long as you keep whisking. continue adding the milk in small increments until it all has been added. Continue cooking the sauce over medium heat, whisking constantly, for the next 3-5 minutes. When the sauce is ready it will have the appearance thick and silky appearance of heavy cream.

Once this happens, turn off the heat and add all the cheese at once. Whisk until the cheese has melted into the sauce and is no longer visible. At this point, the sauce should look quite thick and creamy.
You can return it to the heat and cook it a little longer, whisking occasionally, to let it thicken a little more if you like, but it's better to err on the side of a too-thin sauce at this point. It will thicken a bit more when you reheat it after storage.

Transfer the sauce to storage containers (I like to use a glass Mason jar) and cool completely. A skin will form on the surface of the sauce and the sauce will thicken to a paste-like consistency; this is normal. Refrigerate for up to 5 days, or freeze for up to a month.

To reheat the sauce from frozen, transfer it to the fridge to thaw overnight before reheating.

Transfer the sauce into a small saucepan or microwave-safe bowl. Gently warm over low heat, or in 30-second bursts in the microwave, until warmed. Stir occasionally, or between every 30-second burst in the microwave. It will start off very thick and paste-like, but will soften and return to a sauce as it warms. If the sauce seems too thick, whisk in a splash of milk, broth, or water until the sauce is as thinned as you like.

Use reheated sauce immediately: Toss with cooked pasta or pour over cooked vegetables, chicken, or fish.

Enjoy!!

Wednesday, February 8, 2017

Honey-Chipotle Vinaigrette


One of my favorite things to make and eat is salad. I could eat salad all day, every day if I could, with the exception of for breakfast. I have not really found a good breakfast salad as of yet, but stay tuned! To me, the hallmark of a great salad is a really fantastic dressing. Bottled dressings, while usually sounding great based on the description on their labels, often are disappointing when it comes to flavor. Making your own dressing is both simple and quick, not to mention it will truly make your salads shine. I love whipping up unique, tasty dressings, tossing them with fresh salad fixings, serving it to even the biggest salad skeptic and then sitting back and watching them convert to my side of the salad debate. Salad is awesome. I converted Paul. He never once ate salad during our entire time in college - and we had a pretty awesome salad bar in our cafeteria. Now, he actually looks forward to my salads. The difference is in the dressing.

Speaking of fantastic dressings, this Honey-Chipotle vinaigrette is no exception. I whipped this up on a whim, inspired by my love of pairing chipotle peppers with sweet fruits and vegetables. I was compiling a make-your-own taco salad bar for dinner, including seasoned taco meat, tomatoes, corn, black beans, diced avocado, crushed tortilla chips, cheese, salsa, and sour cream. I decided to make this vinaigrette last minute because I did not really want to load my salad down with sour cream and cheese. This proved to be one of the best decisions I have made in a while since this vinaigrette was the perfect compliment to the salad. Paul could not stop complimenting me as he ate his salad, his greatest compliment being: "You really should start bottling your dressings. This is awesome!"

So despite the horrific lighting, I decided to snap a couple photos and share the recipe here! Yes, I am using tiling samples to prop up my plates. We are currently selecting tile to use for our kitchen backsplash and I just need to pull the trigger already and start installing it. My goal is to have it finished by this weekend and get us one step closer to finishing our kitchen remodel. We are so close! It's just finishing up with some of the details now that all the big stuff is done.

But back to the dressing. This can be customized to your taste. If you want it a little sweeter, add more honey. If you want more of a kick, add more adobo sauce or puree an entire pepper. This paired great with a full loaded taco salad but also was snappy enough to dress up a plate of simple greens.


Honey-Chipotle Vinaigrette

3 T red wine vinegar
3-4 T honey
1 teaspoon salt (add more or less to taste)
1 tablespoon adobo sauce (from a can of chipotle peppers)
1/4 teaspoon cumin
1/4 teaspoon garlic powder
1/4 teaspoon oregano
14 teaspoon fresh ground black pepper
1/2 cup light olive oil or vegetable oil (if using olive oil, make sure it is very neutral in flavor)


Add the vinegar, honey, salt, water, adobo sauce, cumin, garlic powder, oregano, and pepper to a blender. Turn the motor on to blend. With the motor still running, drizzle in the oil until the salad dressing comes together and emulsifies.

Serve immediately or store covered in the refrigerator for up to 4 days.

Thursday, November 19, 2015

Pecan Pumpkin Butter


After I wrote my post concerning all things Lucy, I realized that I forgot to mention the most important fact about my baby: The secret to calming her down. Whenever she is having a crying fit, the only thing that can quiet her (besides being held) is someone singing "This Old Man" to her. I know it sounds ridiculous, but this is in fact the truth.

Just ask my Mom. We were taking a two-hour long drive and about halfway through our trip, Lucy decided that she had had enough of her car seat. She started caterwauling and thrashing about in the back seat and I told Mom to start singing "This Old Man." She commented about how ridiculous that was but after another loud wail from Lucy, Mom started to sing away. Lucy calmed down immediately and actually fell asleep by the time the old man knick-knacked his way up to heaven. My Mom thought that was hilarious.


But in reality, it works every single time. We've tried getting her to like and appreciate less obnoxious songs, but her preference remains. So, if we want to enjoy a quiet trip walk in the park or drive in the car, we normally end up singing a round of "This Old Man" at some point along the way.


The recipe I want to share with you today is one that could certainly be eaten by a toothless old man. Pecan Pumpkin butter is a soft, sweet, and decadent spread that can be used in so many different ways. My personal favorite is swirling a huge spoonful into my morning oatmeal. It definitely turns a boring old bowl of mush into something a little more special. This recipe is a knock-off of the pumpkin butter sold by Williams-Sonoma. The flavor - a remarkable combination of pumpkin spice, toasted pecans, and hints of orange - comes pretty close to matching theirs. If you are looking for a different pumpkin butter recipe to try this fall, consider this one!


Pecan Pumpkin Butter
from Confections of a Foodie Bride

1/2 cup chopped pecans
Zest and juice of 1/2 lemon
Zest of 1/2 orange
3 Tbsp orange juice
1/4 cup dark brown sugar
15 oz canned pumpkin or homemade pumpkin puree
1/2 tsp cinnamon
1/2 tsp nutmeg
1/4 tsp allspice
1/8 tsp cloves
1/4 tsp ground ginger
1/4 tsp salt

Preheat the oven to 350 degrees.

Spread pecans on a baking sheet and roast for 7 minutes, until browned and fragrant.Run the pecans through the food processor until finely ground and the nuts have begun to release their oil and take on a "pasty" consistency.

In a 2-qt sauce pan over medium heat, combine the citrus zests and juices and dark brown sugar. Stir until warmed. Add pumpkin, nuts, and spices and reduce heat to low, simmering for 20-30 minutes, until thickened and the color darkens.

Stir and taste for seasoning and sweetness occasionally, adding additional spices as necessary.

Monday, October 12, 2015

Apple Butter


This apple season has been phenomenal! After a few years of really bad apple crops, the trees have produced some wonderful fruit this Fall! We have already made a few trips to the orchard for bags and bags of apples and have sampled nearly 15 different varieties! The Ginger Golds in particular have been exceptional with their crisp bite, firm yet juicy texture, and sweet-tart flavor. We have apples everywhere - all over the countertops, in decorative glass bowls adorning the dining room table and hutch, and filling the spacious back compartment of our double stroller from a recent trip to the park where the public apple trees were overflowing with beautiful, ripe fruit just begging to be plucked from the bowing branches. Having our house filled to the brim with apples is not a problem for me and my troop, for every member of this familiy (with the exception of Lucy and her one-ingredient diet) is obsessed with apples. Matthew and Emma eat about 3-4 apples a day. They would eat more except I selfishly cut them off because I'm worried they'll eat our entire supply and leave none for me!


Besides just eating the apples out of hand, we've been making a fair share of sweet apple treats. Every year, I make a huge supply of apple butter to can for us over the next couple of months. Paul loves apple butter and looks forward to enjoying it each Fall. I normally pile our crockpot high with all the apples, spices, and sugar and allow the butter to cook that way, but I wanted to try a different method this year. The most recent issue of Cook's Illustrated had a recipe for apple butter that included a generous portion of Applejack. That sounded awesome, so I chose that recipe but added in a generous amount of spice because their recipe did not even call for cinnamon. To me, apple butter should always have a bit of spice. 

The result was a beautiful, shiny apple spread that I could directly out of the jar with a spoon. No toast required! We've been enjoying it in our oatmeal, as a filling for apple pie, rolled up into cinnamon roll dough along with fresh diced apples, and mixed with mustard and dappled over bratwurst. This stuff is incredible. No more crockpot recipe for me. This is the recipe I'll be sticking with in the future.


Apple Butter
adapted from Cook's Illustrated Magazine September/October 2015

4 pounds of assorted apples
1 cup apple cider
1 cup Calvados brandy or Applejack
1 cup granulated sugar, (7 ounces)
1/2 cup packed light brown sugar (3 1/2 ounces)
3 tablespoons lemon juice
1/4 teaspoon salt
1 teaspoon ground cinnamon
¼ teaspoon freshly grated nutmeg
¼ ground ginger
⅛ teaspoon ground cloves
⅛ teaspoon ground allspice

Combine apples, cider, and Calvados in large Dutch oven and bring to boil over medium-high heat. Reduce heat to medium-low, cover, and simmer, stirring occasionally, until apples are very soft, about 30 minutes.

Working in batches, transfer apples to food mill and process. Discard skins and transfer purée to now-empty Dutch oven. Stir in granulated sugar, brown sugar, lemon juice, salt, and spices. Simmer over low heat, stirring occasionally, until mixture is browned and thickened and rubber spatula or wooden spoon leaves distinct trail when dragged across bottom of pot, 1 to 1 1/2 hours.

Transfer apple butter to jar with tight-fitting lid and let cool completely before covering and refrigerating. Apple butter can be refrigerated for up to 1 month.

Makes about 3 cups

Monday, February 2, 2015

Creamy, Smooth, Delicious Hummus

 
Hummus is one of our favorite condiments. I feel funny even referring to it as a condiment because the kids and I will oftentimes make a meal out of a big bowl of hummus and some cut-up vegetables and pita bread! I certainly would not be doing that with ketchup or mustard. Well, except when I am in the midst of a mad pregnancy craving for mustard - then, I just might be seen eating it by the spoonful along with a fistful of dill pickles. This has been my predominant craving every single pregnancy.Why don't I crave non-gross things like ice cream?

My biggest pet peeve with most store-bought hummus packs is that they are not completely smooth in texture. Some brands have a gritty texture from the chickpeas not being blended entirely or because a lesser amount of tahini/oil was used when processing the hummus. In college, I hated the hummus served in the cafeteria (sorry Notre Dame Food Service!) because it was so salty, chunky, and blech! I never understood why people loved the stuff so much and just assumed it was one of those "health food trends" that people ate because it was good for them and not necessarily because they liked the flavor - like egg white omelets or brown rice. Then, I went to a Middle Eastern restaurant where they served hummus as an appetizer along with warm pita bread and it was so silky, so smooth, so beautifully seasoned, that I fell in love. I have since found that Sabra, a brand of hummus easily found in stores, is acceptably smooth and creamy. The brand produces an entire line of flavored hummus that I love but unfortunately the high price tag is often hard to stomach when it come to our family food budget.


Hummus was part of our Super Bowl appetizers this year.

I told him to "give me a REAL smile". This is definitely NOT it.


Too busy eating to smile.

A couple years ago, after I opened my beautiful food processor for Christmas, I began resorting to making my hummus at home and found a recipe that produces the perfectly smooth, creamy taste that made me fall in love with it in the first place. It is super easy to make - requiring maybe a total of 10 minutes - and is way more delicious than anything you can buy! There is a little bit of upfront cost involved because you do have to buy a jar of Tahini (I can find a 16 ounce jar for around seven dollars), but after that initial purchase you can make about 6 large batches of hummus from a single jar of Tahini. It's much easier on the wallet!


Engrossed with the game. We didn't care who won - and it was a good game to watch!


Fresh, homemade hummus tastes a lot "brighter" than the grocery store varieties. It's great plain, or you can add in a variety of mix-ins to give your hummus a unique flavor. We like chopped fresh cilantro and jalapeno, smoky chipotle, fresh lemon zest and dill, roasted garlic and rosemary, or whatever sounds good to you!

For the batch of hummus I photographed for this post, I kept things simple and just drizzled some chipotle-infused olive oil that I have over the top. It adds a great amount of extra flavor without too much heat, so the kids can still enjoy it right along with us!

Even though I technically published this on a Monday, I'm linking it up with Jessica and Katie and all the rest for #TuesdayTalk.


Creamy, Delicious Hummus
from Cook's Illustrated

3 tablespoons lemon juice (fresh is best, but bottle lemon juice works great!)
1/4 cup water
6 tablespoons tahini
2 tablespoons extra virgin olive oil, plus extra for drizzling
14 ounces chickpeas, rinsed and drained
1 large garlic clove, minced
1/2 teaspoon salt
1/4 teaspoon ground cumin
1 pinch cayenne pepper

Combine lemon juice and water in a small bowl or measuring cup. In another small bowl, whisk together tahini and 2 tablespoons oil.

Process the chickpeas, garlic, salt, cumin, and cayenne in food processor until almost fully ground, about 15 seconds. With machine running, add lemon juice-water mixture in steady stream through feed tube. Scrape down bowl and continue to process for 1 minute.

With machine running, add oil-tahini mixture in steady stream through feed tube and continue to process until hummus is smooth and creamy (about 15 seconds, scraping down bowl as needed).
Transfer hummus to serving bowl and cover with plastic wrap and let stand until the flavors meld, at least 30 minutes. Drizzle with additional olive oil, if desired, and serve with cut-up vegetables, pita bread, or tortilla chips.

This can also be done in a blender, but it takes a lot more scraping and patience. If you have a choice, go with the food processor.

Tuesday, December 16, 2014

My Favorite Salad Dressing Ever

Emma had her best friend Maddie over to play!
Christmas is almost here and we can hardly believe it. In preparation for all the Christmas feasting, I thought it appropriate to talk about salad. Salad dressing particular. The dressing is pretty much the only reason my husband eats salad, so it has to be good!

I love to make my own salad dressings because you can modify them to suit your tastes! Lots of the dressings on the store shelves have such muted flavors and are too sweet, too salty, or too oily! Every once in a while, I crave the flavor only a store-bought Italian dressing can provide and the Hidden Valley ranch dressing always tastes great on anything - and the kids eat it too!

But, cream-of-the-crop, give-it-the-top, this Cilantro-Lime Vinaigrette is my favorite dressing in the whole wide world. Now, you probably have to be a bit of a cilantro lover to like it. However, I have served it to a couple people who detest cilantro and even they liked it. Or so they said. Maybe they didn't really but were too polite to say otherwise.

Either way, I really, really love this dressing. Paul also really, really loves this dressing. It comes from one of our favorite restaurants. I had a salad with tossed with this vinaigrette and asked the chef for the recipe. He gladly gave it to me and I have been making it at home ever since! Ironically, whenever I go back to that restaurant, I'm so tempted to get the same salad each time even though I can technically recreate it at home. You'd think I'd want to try something else on their fabulous menu - like the trout, salmon, or prime rib - but this dressing just makes salad so incredibly delectable!

Certainly an unappetizing-looking dressing. But trust me - it's delicious!
Warning: It does turn a horrifying green color in the blender. The looks on my kids' faces when they watch me blend it is priceless. Paul came home and saw me making it once and asks (with fear): "Is that another kale smoothie?!?!?" He still hasn't forgiven me from the last time I made him drink one.

Here are some ideas for using this dressing:

Salad #1: Mixed greens, sugared pecans, julienned jicama, chopped tomatoes. Simple and yummy.
Salad #2: Baby Spinach, segmented oranges, sugared pecans, feta cheese.
Salad #3: Baby Arugula, quinoa, feta cheese, roasted salmon fillet with extra dressing drizzled over the salmon. (My FAVORITE)
Salad #4: Baby Arugula, freshly sauteed shrimp, segmented grapefruits, red onion.

Today's Salad: Orange segments, red onion, spinach, and lemon quinoa pilaf.
But really, you could do anything. It's also great for taco salad or burrito bowls!

Cilantro-Lime Vinaigrette
from Firebirds Restaurant

2 tablespoons cider vinegar
2 tablespoons lime juice (fresh is best - I've tried the bottled and it really doesn't work in this recipe!)
2 tablespoons honey
1 1/2 tablespoons chopped fresh garlic
1/2 teaspoon salt
1/2 teaspoon pepper
1/4 cup fresh cilantro (I add more if I feel cilantro-y!)
1/2 cup olive oil or vegetable oil

Add all the ingredients into a blender except the oil. Blend until smooth, scraping down if necessary. With the blender set on low, slowly drizzle in the olive oil and blend until completely emulsified.

Tuesday, August 12, 2014

DIY Coconut Milk


I am so psyched about how wonderful homemade coconut milk tastes that I simply had to share the method as soon as possible. I use coconut milk all the time - in baking, cooking, or even poured over my cereal as a non-dairy substitute. The problem is that coconut milk normally runs at around $2.99 per can, which is a little bit steep. When I came across an article detailing how easy it is to make coconut milk at home, I had to test it immediately. Now I can't stop. Shredded coconut is so cheap in the bulk section of our store (like $0.99/pound) that this may very well become a way to cut down on our grocery budget. As an additional incentive, homemade coconut milk tastes so much better than canned coconut milk. I have no idea why - and maybe this is all completely in my head just because I feel so proud of my homemade batches - but I do find it more creamy, pure, and rich tasting.

Coconut milk could not be more easy to make. All you need are equal parts shredded, unsweetened coconut and water. Plus a dash of baking soda at the end. That's it.

First, the water is brought to just under a boil - or to about 200 degrees. The temperature is important since water that is too hot will cause the mixture to take on a curdled appearance. The hot water is mixed with the shredded coconut and the entire mixture is blended at high speed for two minutes. Then, it is poured through a fine-mesh strainer. Be sure to press on the solid coconut left behind in the strainer with a spatula to extract as much of the yummy liquid as possible. Discard any remaining solids and allow the milk to cool for about 15 minutes.


Whisk in a touch of baking soda to keep the milk mixture more alkaline and thus further discourage the proteins from clumping. Voila! Coconut milk!

Keep it in the fridge for up to two weeks. Delicious in all kinds of Thai dishes, oatmeal, smoothies, curries, rice pudding...oh the list is endless!


Homemade Coconut Milk
adapted slightly from Cook's Illustrated

1 3/4 cups water
1 3/4 cups unsweetened shredded coconut
1/4 teaspoon baking soda

Pour the unsweetened coconut into a blender. In a small saucepan, bring the water to near boiling, or to about 200 to 205 degrees. I used my instant-read thermometer to keep track of the water temperature. Don't let it get too hot before adding the coconut or it will curdle. Pour into the blender with the unsweetened shredded coconut. Process for 2 minutes. Transfer to fine-mesh strainer set over large measuring cup and press to extract as much liquid as possible; let cool for 15 minutes. Transfer shredded coconut to clean dish towel in large bowl. Gather sides of dish towel around coconut and squeeze remaining milk into measuring cup. Whisk baking soda into milk. Discard shredded coconut and use milk as desired or refrigerate for up to 2 weeks. This recipe makes the equivalent of one 13.5 ounce store-bought can of coconut milk but doubles or triples easily!

Saturday, February 23, 2013

Homemade Nutella for Paul


You know you are 9 months pregnant when...

1) You feel tired all the gosh darn time. You wake up in the morning and feel more exhausted than you did when you went to bed the night before only now a delightful cocktail of dizziness and disorientation has been thrown in for good measure. And no amount of coffee will make you snap out of it! When your toddler comes to you asking for something, what you hear is about as intelligible as the adult voices on an episode of The Charlie Brown Show ("Wah wah wa waaaa!"). And you probably took about 15 prenatal vitamins because you can't remember if you already took one and thus end up popping pill after pill just to make sure your nutritional bases are covered.

2) The only thing you can squeeze your massive frame into are yoga pants, your husbands sweaters, and the couple XXL t-shirts that you got for free at a charity bowling event. You are one stylish blimp.

3) Everything makes you cry. Everything. Including discovering that the grocery store is out of Pink Lady apples and you literally made the trip just to pick up a couple.

4) Everything also makes you mad. Your poor hubby stays at work a bit longer just to hide from your Jekyll and Hyde behavior. He's hoping it will all go away in a couple weeks.

5) You fall down the stairs because your bulging belly is so swollen that you are unable to see your feet and you totally miss one of the steps. And you can't get back up after the fall because your abs are pretty much nonexistent. This brings to mind the image of a pill bug that has flipped onto its back and now is helplessly/frantically moving all its legs in a sad attempt to flip upright once more. Husband comes to the rescue. Instead of thanking him, you chastise him for choosing to buy a house with a steep, slippery staircase (see #4 above).

6) You pull on your pants and tie your shoes while laying flat on your back. It's just more comfortable that way.

7) You get stopped by random women at the gym, the mall, or the grocery store who find it necessary to traumatize you with their horrific birth stories.

8) You are baking/cooking/nesting like there is no tomorrow. Every day brings a new opportunity to make another sweet indulgence, fold another tiny onesie, or bake some artisan bread because you have no idea what your schedule will be like once the new baby arrives!

****


Needless to say, I feel very, very sorry for my poor hubby and the emotional mess for a wife he has had to put up with as of late. He has been doing his best to not get upset when I lash out of him for no reason whatsoever and has been great with helping pull out the baby gear, make meal plans, and clean the house in preparation for the new baby.

To show my appreciation for all that he does, I decided to make a batch of Nutella for Paul. His favorite snack is Nutella straight from the jar, but we have not been buying it recently because it is so pricey. However, we can get hazelnuts in bulk from our grocery store for fairly cheap, so I decided to surprise him with a homemade batch. He likes homemade peanut butter so much better than the store-bought stuff, that I hoped homemade Nutella would be just as well received.

The recipe was a breeze to put together, mainly because the food processor does all the work. First, the nuts are roasted, allowed to cool, and then removed from their skins. Then, the nuts are ground in a food processor until their oils are released. Finally, cocoa powder, sugar, vanilla, oil, and a touch of salt are added to create a perfectly smooth, ethereal chocolate spread. Delicious.


Homemade Nutella
from The America's Test Kitchen DIY Cookbook


2 cups (8 ounces) hazelnuts
1 cup powdered sugar
⅓ cup Dutch-processed cocoa powder
2 tablespoons vegetable or canola oil
1 teaspoon vanilla extract
1 teaspoon instant espresso powder (optional - but amazing)
1/8-1/4 teaspoon salt (or to taste)

Preheat oven to 375 degrees. Spread the hazelnuts out on a single layer on a rimmed baking sheet and roast until dark brown and fragrant, 12-15 minutes, rotating the baking sheet halfway through baking. Keep a close eye on them, as they can go from perfect roasted to burnt in a short amount of time. Transfer the hazelnuts to a medium-sized bowl.

Once the hazelnuts are cool enough to handle, place a second bowl upside-down on top of the bowl with the hazelnuts. Shake vigorously for about 30 seconds to remove the skins of the hazelnuts. It may take a few times to get all of the skins off. Each time, remove the hazelnuts that have lost their skin to the bowl of a food processor, then continue shaking.

Process the hazelnuts in a food processor until their oil is released and they form a smooth, loose paste, 2-5 minutes, scraping down the bowl often.

Add the powdered sugar, cocoa powder, oil, vanilla extract and salt and process until fully incorporated, scraping the bowl as needed, about 2 minutes. The mixture will loosen and become glossy. It will continue to thicken as it rests. Transfer the spread to a jar with a tight-fitting lid or an airtight container. You can store it in the refrigerator or at room temperature for up to 1 month.

Friday, February 15, 2013

White Chocolate Peanut Butter


For years and years, I could not stomach the idea of a peanut butter sandwich. I hated straight peanut butter spread so much that the smell of it would make me gag. I think this reaction stems from memories of long car trips in the back seat of our 12-passenger van, situated uncomfortably between two of my smelly brothers (sorry guys!). I normally was overheating because the air conditioning was completely ineffective to anyone sitting beyond the second row of seats, and the commingling smells of Fig Newtons and Peanut Butter and Jelly sandwiches rendered me utterly nauseated. Occasionally, Dad would open a bag of Bugles which would bring some relief (I still love Bugles. Do they still make those? Anyway, I digress).

I still cannot face a Fig Newton, but luckily during my pregnancy with Matthew my acceptance of peanut butter returned. When out for a day-long hike, my favorite power sandwich to bring along is Peanut Butter and Banana on Oatmeal Bread. Delicious and very, very satisfying.


With my rekindled love for peanut butter, I began tasting different varieties that are available at our local grocery store. I fell in love with the Peanut Butter & Company variations - including Dark Chocolate Dreams, The Bee's Knees, and White Chocolate Wonderful. Out of all of these, the White Chocolate Wonderful makes me swoon, especially when paired with orange marmalade and sliced toasted almonds on homemade bread.  A delicious sandwich reminiscent of a Creamsicle.

The only problem with my White Chocolate Wonderful? It costs about $4.00 for a fairly small jar. A bit of a splurge even if I end up stashing the jar in the back of the pantry to eat by myself with a spoon when the hubby and child are not watching (Shhhhh...). However, ever since Paul gave me a food processor for Christmas last year, I have been making many different spreads and butters and figured that it could not be too difficult to replicate the sweet, creamy indulgence of White Chocolate Wonderful.

Just a few ingredients, a couple spins in the food processor, and this emerged...


And it was good.

Dangerously good.

Give this a whirl! And if you do...please make a sandwich with orange marmalade and toasted almonds. It's transcendent. And that's from a former hater of all things peanut butter.


White Chocolate Peanut Butter

2 cups roasted, salted peanuts
2 tablespoons canola oil
1/3-1/2 cup white chocolate chips, melted (I like the 1/2 cup personally...)
1 teaspoon vanilla

In the bowl of a food processor, process peanuts until completely broken down and slightly creamy. This may take up to 3 minutes. Just let it go while you melt the white chocolate in the microwave (on HIGH for 60-90 seconds, stirring with a spatula every 20 seconds or so). Add the canola oil through the feed tube and continue to process until smooth.  Add the white chocolate and vanilla and continue processing until completely combined and delicious. Taste and add more oil for a smoother texture or more white chocolate if you like it sweeter! Transfer to a Mason Jar and store in the refrigerator.

Monday, May 21, 2012

Apple-Cranberry Vinaigrette


Things have been insane around here.  Moving is stressful.  We have our closing this week and I am both dreading and looking forward to it.  Like any commitment, there are a lot questions racing through our heads about whether we are doing the right thing purchasing a home at this point in our lives.  The amount of savings that will be obliterated with all the closing costs alone causes a fair amount of stress.  Then there is the packing, the organizing, the planning, the throwing away of items that we once considered treasures for the sake of freeing up some space.

Mr. Matthew has no idea what is going on.  I wonder how long it will take for him to get used to the new house.  Knowing him, he probably will not even notice the difference just as long as his monkey and his books are there with him.

However, he IS enjoying reaping the benefits from our management company's decision to replace the carpets after we move out.  Since we no longer have to worry about keeping them clean, Matthew has been allowed the following:

1)  To eat breakfast while watching Curious George in the living room.


2)  To wear shoes in the house!


I hope he realizes that he will be doing neither of these activities once we move into our new place!

We took a short break from all the chaos of cleaning and packing to take a hike through the woods.  There is a beautiful 5-mile trail along a creek bed that is so peaceful and relaxing.  A little too relaxing for Matthew apparently.  We had to cut our little jaunt short because the little guy just could not stay awake.  We made it about a mile into the hike before we had to turn around again because he was sound asleep.


The unfortunate thing about that backpack carrier is that it is not conducive to napping, so Matthew's head just flops along uncomfortably.  Neither Paul nor I wanted him to wake up with a stiff neck, so we turned back. Back at home, Paul and I reconnected over a shared peanut butter sandwich.  We had a pretty intense discussion about the benefits of smooth versus chunky peanut butter (Paul vouches for smooth, while I prefer chunky).  It was a dumb subject to debate for 20 minutes, but it was really fun to share a few laughs and relax while discussing something completely irrelevant and unimportant (who knew we were so passionate about our peanut butter!).  Plus, it was nice to take the time to enjoy the place that was our first home as a married couple.  The place where we brought our son home from the hospital.  The place where we mourned the loss of our two angel babies.  The place that, despite its many structural flaws, holds a huge amount of sentimental value for us.  But the time has come for us to move on.


The recipe for today is a simple, sweet vinaigrette that is one of our favorites.  It takes just minutes to throw together and is wonderful on salads with any combination of greens, fruits, nuts, or cheese.  One of my favorite combinations is dried cranberries, toasted pecans, apples, and Parmesan cheese.  Paul prefers pears, candied walnuts, blue cheese, and dried cherries.  Feel free to use your favorite combination!


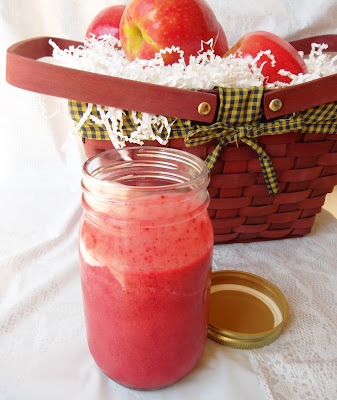
I love giving dressing away in Mason Jars as gifts.  This vinaigrette turns pink when blended - so it makes an especially pretty gift!

Cranberry-Apple Vinaigrette
from Allrecipes


1 cup cranberries, fresh or frozen
1/4 cup apple juice concentrate
1/2 cup sugar
1/2 cup cider vinegar
1 teaspoon salt
1 teaspoon ground mustard
1 teaspoon grated onion
1 cup vegetable or canola oil

In a blender, combine all ingredients except the oil.  Process until smooth.  With the blender running on low, gradually add the oil in a steady stream.  Process until thickened and smooth.  Refrigerate for up to 2 weeks.

Tuesday, October 11, 2011

Apples, Apples, Apples


Last weekend, the weather was absolutely gorgeous. Temperatures were in the upper 70s and there was not a cloud in the sky. It was the perfect weather to take advantage of all the fall festivals taking place all over the state this month. First, we headed up to Franklin, PA for the annual apple festival. The drive through the countryside was simply breathtaking - the colors of fall are finally being fully displayed by the various trees and shrubs. The Apple Fest itself was a little too crowded for our tastes. We could barely shuffle among the various vendors, booths, and activities without having cider spilled on us or a cigarette being accidentally shoved in our faces. Not to mention, we had Matthew in the stroller which made it extra difficult to maneuver through the crowds. We spent a minimal amount of time there and bought only a gallon of apple cider (mainly because Matthew was thirsty and we had failed to bring more water - the thirsty kid ended up drinking half the gallon while we were there!).

On Sunday, we headed north into New York to attend a Fall Festival held at a nearby ski resort. Attending this particular festival has become an annual tradition for Paul and I. We enjoy wandering around looking at different craft vendors, sampling some local jams and jellies, petting llamas, pigs, and yaks, purchasing a bag of kettle corn, and parking ourselves on a nearby hill to munch on it. We look forward to it all year long!

Here are a couple photos of Matthew sitting in the same pumpkin patch this year and last year at the Fall Festival. Talk about pulling at this mommy's heart strings. He has gotten so big! Same annoyed expression on his face though. And no, we did not plan on him wearing almost the exact same outfit both years. Funny how things like that just happen.


Later that same afternoon, we headed over to Girard to an apple orchard. We had intended to swing by for only a few pounds of apples. But the apples were so beautiful, big, and inviting that before long we had closer to 30 pounds. It took a lot of restraint even then to not continue picking. And the whole lot only cost six bucks!


Matthew missed the whole concept of picking apples. Paul and I took turns hoisting him into the air to pick an apple or two off the tree. He successfully managed to pick a few, but then lost interest, choosing instead to take the apples we had already placed into our basket and trying to put them back on the tree (there is a video at the end of this post). It took Paul and I a couple of minutes to notice - basically, we realized that we kept picking apples off the tree, but our basket was not getting any more full. He finally bored of this activity and sat himself down under one of the trees and noshed on a couple apples (taking a large bite out of one before moving on to the next).

With so many apples, Paul and I immediately set to work making a delicious apple pie. We ended up eating a quarter of the pie for dinner. Paul ate the rest for his lunch the next day (and he wonders why his waistline continues to expand). Next, we made some apple butter, applesauce, apple challah, and apple cake. All of these goodies headed to the freezer to be saved for enjoyment during the winter months. I love this time of year!

This apple butter is a merge of many many different sources. I choose to use my slow cooker to make apple butter because it produces a wonderful aroma that fills your entire home. Homemade potpourri! Apple butter is delicious mixed into oatmeal, spread on toast, dolloped on pancakes, and blended with yogurt. It freezes well and makes a wonderful gift for the holidays.

And thanks to this recipe, Matthew discovered the CrockPot. It was love at first sight. Notice how he holds the paddle attachment to my KitchenAid hostage in his grubby little fist.


Oh, and running around sans pants is his new thing. Whatever.

Apple Butter

12 medium-sized apples (I used Northern Spy, Rome, McIntosh, and Mutsu)
1 tablespoon vanilla
1 cup white sugar
1 cup brown sugar
2 teaspoons cinnamon
1/2 teaspoon ground cloves
1/4 teaspoon ground nutmeg
Pinch of salt

Peel, core, and finely dice the apples. Pile them into your slow cooker. Add the remaining ingredients and stir well to combine.


Cover and set the cooker to high. Let cook for one hour. Reduce to the lowest setting and continue to cook, stirring occasionally until dark and very thick. This will take anywhere from 8-11 hours, depending on the type of apples being used. When ready, it should look like this.


Uncover and continue to cook for about 1 hour, whisking vigorously every 10 minutes. Spoon into sterile containers.


And here is a short video we took on my camera of Matthew at the Apple Orchard. I tried to upload this three times before I finally was able to get it to work!

Matthew Picking Apples - October 8, 2011

Thursday, September 15, 2011

A Dinner Party

I love to entertain.

I really do.

Then why do I freak out so much when I finally have the opportunity to throw a dinner party? I think my anxiety about dinner parties stems from my innate fear of displeasing people. What if I make something my guests will not like? What if I accidentally make something they are allergic to and one of them collapses on the floor due to anaphylactic shock? Or...and perhaps even more likely....what if I burn the house down in my attempts to present a fancy, company-worthy dish?

You may think my fear is not stemmed in some sort of reality - but really, it is. There actually was one occasion where the hubby and I almost rendered ourselves homeless as we set out to recreate our favorite Chicken Tikka Masala dish from a local Indian restaurant. While broiling our yogurt-marinated chicken breasts in our tiny kitchen, we carefully monitored the internal temperature of the bird with a thermometer with a rubber cord that enabled us to keep the oven door closed. Both of us were science majors at the prestigious University of Notre Dame and graduated with honors in our respective concentrations...yet, we both managed to forget the simple, commonly-known fact that rubber is flammable. So yes, the cord of our thermometer burst into flames and quickly ignited the chicken followed by the pan drippings and the rest of the oven. We opened the oven door quickly only to allow a huge, dark cloud of smoke to escape and large yellow flames to dance in our faces, as if mocking us for our stupidity.

Luckily, we keep a fire extinguisher under our sink for just such an emergency. My husband quickly grabbed it and prepared to aim it at our flaming oven as I rushed outside with the child, yelling behind: "Save the chicken!" I did not see what happened next, but apparently Paul managed to reach inside the oven with some barbecue tongs and grab out each piece of flaming chicken before putting out the fire with the extinguisher. His act of bravery saved our dinner. We managed to clear the rest of the smoke out of the house, spray some air freshener about, and happily arrange our chicken on a beautiful serving platter right before our guests arrived. And you know what? It was delicious! And the extra char on the chicken was divine.

Even though that situation worked out for the better, my anxiety about dinner parties continues. Tonight, we are hosting my old boss for the night. He loves fine food, good wine, and friendly conversation. Basically, a casserole does not cut it. Not that I would ever serve a casserole. I decided for this dinner to set about making Boeuf Bourguignon, the famous French stew immortalized by Julia Child. I planned to serve this with a souffle of garlic mashed potatoes, some crusty rolls, and a fall salad. Dessert would be a Bittersweet Chocolate Mousse Cake served with fresh raspberries.

I made most of the stew as well as the dessert last night so that I am free tonight to focus on the side dishes tonight. This afternoon, I put the finishing touches on the salad I plan to serve and I am super excited with the dressing I just made. I am making a Harvest Salad with pears, Honeycrisp apples, dried cranberries, pecans, blue cheese, and a Maple-Dijon Vinaigrette.

Maple-Dijon Vinaigrette

1 Tablespoon Minced Garlic
1/4 Maple Syrup
1/4 Cider Vinegar
2 Tablespoons Dijon Mustard
3/4 Olive Oil
Salt and Pepper to Taste

Whisk all ingredients together! Be sure to whisk the mixture enough to completely emulsify the oil. It should be a pale yellow color.

Hopefully the rest of dinner tastes as good...