Thursday, April 21, 2016
Lucy's Favorite Green Monster Smoothie
I first made a "green smoothie" a few years ago when Matthew was about a year old. It had peanut butter, bananas, and, of course, spinach in it. It wasn't so much green as a sludgy, grayish-brown color. It was not good. Paul took one sip and just about threw up. He still tells people about the time I tried to poison him with my "salad smoothie". Because of this, I stepped away from the blender and never joined the green-smoothie making craze.
Now, as an owner of a powerful Vitamix blender, I decided to give one of the green smoothies from the Vitamix recipe book a try and I fell in love. So refreshing! So healthy! I was pleasantly surprised by how much I loved it. I was greedily slurping down my smoothie, when I suddenly became aware of a tiny little person, not quite two-and-a-half feet tall, flapping her arms wildly while hooting like an owl in an attempt to get my attention. Lucy saw me enjoying that drink and wanted a taste of it herself. I gave her a spoonful and she gulped it down, then froze every muscle in her body as she processed the taste and temperature of this unexpected treat, and then smiled and greedily demanded more. And more. And more. Pretty soon, tiny little Lucy had drank half my smoothie. My other two little wards were a little too turned off by the flavor to give it a go, but Lucy was hooked. I made this smoothie again the next day, and the day after that, and the day after that (there was a huge sale on grapes and oranges so I had plenty of materials). Each time I brought out the blender to make this, Lucy would get very excited in gleeful anticipation of her new favorite drink.
This is a fantastic green smoothie and the only one that I have truly loved. You really do not notice the spinach at all and the sheer variety and amount of fruits in the mixture make a very refreshing, energizing drink. I have been drinking this immediately following my workouts and I believe it has been instrumental in helping my body recover and hydrate after an intense sweat session. I love how great I feel after drinking a huge glassful! Plus, I'm really enjoying my new afternoon tradition of splitting a smoothie with my baby.
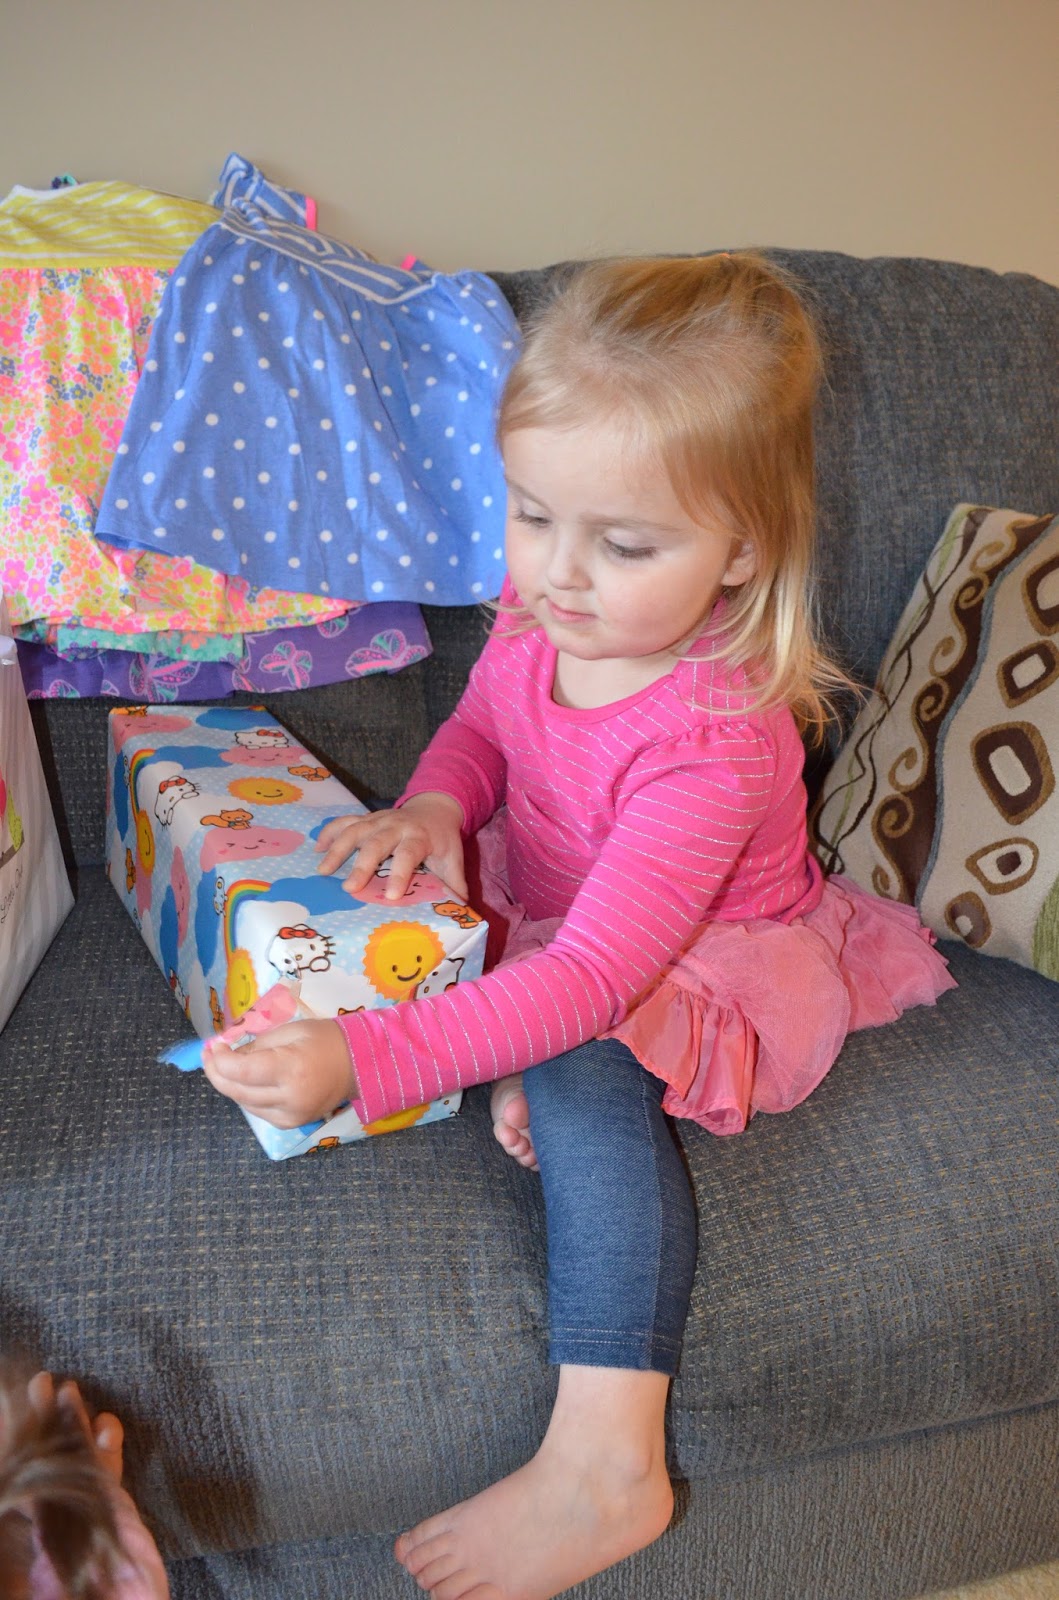
Lucy finds the drink energizing as well.
If you have also been a bit skeptical about green smoothies in the past, I think this one could possibly change your mind!
Green Monster Smoothie
adapted from the Vitamix Recipe Book
1 frozen ripe banana
1 cup fresh sliced pineapple
1 1/2 cups red or green grapes (the green grapes will give you a more vibrant green color)
1 orange, peeled
1/8 teaspoon lime zest (optional, but good)
1 1/2 cups spinach
2 tablespoons honey, sugar, or agave (I never add this - it's sweet enough)
1 cup ice
Add all ingredients in the order listed. Blend until smooth. Pour into chilled glasses or, if you're a baby, a cup with a tight-fitting lid. Your floor will thank you.
Tuesday, April 19, 2016
Blueberry Lemon Cake
I cannot express enough how much I love to bake and decorate layer cakes. There is something therapeutic about baking the layers, making the frosting, and then carefully spreading the frosting over the layers. Maybe it's also because cake is usually very much appreciated and the effort of making a cake rarely goes unacknowledged and unappreciated. Everyone loves a really good slice of cake. Everyone that is, except for my strange little children.
Each year, my kids get to choose the cake flavor to be their birthday cake. Normally I have to really encourage Matthew to think beyond the boring, unimaginative flavors of chocolate and vanilla in order for him to pick a flavor that is a bit more exciting and unique. Emma, on the other hand, had been adamantly requesting a Blueberry Lemon Cake for her birthday for the past several months. I was so excited by her specific request and carefully selected the perfect recipe to make. I worked all afternoon baking and decorating the cake. I chose to decorate it simply with extra blueberries, some coconut that I colored to look like Easter grass, a couple chocolate eggs, and a few chocolate chicks that I had found at the grocery store. The chocolate chicks were so cute and reminded me of Emma's love of ducks and birds so I thought that they would be perfectly fitting decorations for her cake. The birthday girl was quite pleased with the final product.
However, after we had sang to Emma and she had blown all the candles out, she did not care to even try the cake that she had so passionately been requesting and looking forward to eating for months! I was heartbroken! I had worked so hard and was so excited to watch her enjoy eating a slice of the cake. I just about cried. Paul reminded me that this happens pretty much every birthday with each kid. They are just too excited and overstimulated after a day of attention that the last thing they want to do is sit down and eat. They'd just rather be running around and playing with their new toys. He's so right, but it's a bit depressing nonetheless. Matthew made up for Emma's lack of interest in cake by eating an entire gigantic slice and singing my praises the whole time. Matthew is not much of a dessert lover, so that was an incredible compliment!
This cake is such a beautiful, elegant treat! A lemon-kissed buttermilk cake with juicy blueberries suspended throughout enveloped in the most deliciously light and creamy whipped lemon cream cheese frosting - what is not to love? It's definitely one of my favorite layer cakes.
For the record, Emma did eat a slice of cake for breakfast the morning after her birthday. And she loved every bite.
Blueberry Lemon Cake
from Mel's Kitchen Cafe
For the Cake:
1 cup (2 sticks, 8 ounces) butter, softened to room temperature
1 3/4 cups (13 ounces) granulated sugar
1 tablespoon fresh lemon zest
4 large eggs (7 ounces), room temperature
2 teaspoons vanilla extract
2 1/2 cups (12.5 ounces) all-purpose flour
2 teaspoons baking powder
1/4 teaspoon baking soda
1/2 teaspoon salt
1 cup buttermilk
1/2 cup fresh lemon juice
2 cups (12 ounces) fresh or frozen blueberries (do not thaw if frozen)
For the Whipped Lemon Cream Cheese Frosting:
12 ounces cream cheese, softened to room temperature
1/2 cup (1 stick, 4 ounces) butter, softened to room temperature
4 1/2 cups (18 ounces) powdered sugar
1 to 2 teaspoons fresh lemon zest
1 tablespoon fresh lemon juice
2 tablespoons heavy cream
Preheat the oven to 350 degrees. Line the bottom of two 9-inch round cake pans with at least 2-inch sides with parchment paper and coat with nonstick cooking spray. Set aside.
In the bowl of an electric mixer fitted with the paddle attachment, cream together the butter, sugar and lemon zest until light and fluffy, 4-5 minutes. Add the eggs and vanilla until well-combined, 1-2 minutes, scraping down the sides of the bowl as needed.
In a separate bowl, whisk together the flour, baking powder, soda and salt. Stir the dry mixture into the wet ingredients and mix on low speed until just combined and a few dry streaks remain.
Add the buttermilk and lemon juice to the batter, and stir by hand, folding the batter until just combined.
In another bowl, toss the blueberries with the 2 tablespoons flour. Add the blueberries and remnants of flour to the batter and fold in by hand with a spatula or wooden spoon until just-combined. Be careful not to over-mix!
Spread the batter evenly in the prepared pans and bake for 35-40 minutes until just baked through. The top will spring back lightly to the touch and a toothpick inserted in the center should come out with moist crumbs but not wet batter.
Let the cakes cool for 5-10 minutes in the pans before turning them out onto a cooling rack to cool completely.
For the frosting, whip the cream cheese and butter together with a handheld electric mixer or with an electric stand mixer fitted with the paddle attachment until light and fluffy, 2-3 minutes. Add the powdered sugar, lemon zest and lemon juice and mix on low speed (so the powdered sugar doesn't fly everywhere) until combined. Increase the speed to medium and mix until creamy, 1-2 minutes. Add the heavy cream and whip the frosting until very light and fluffy, 2-3 minutes.
When the cake has cooled completely, place one round on a platter or plate and spread the top evenly with frosting. Place the other cake round upside down on the frosting and press just lightly. Continue frosting with a thin spatula or offset spatula until the top and sides of the cake are evenly frosted. Store in the refrigerator, but be sure to remove 1-2 hours before serving!
Saturday, April 16, 2016
Emma Turns Three
I have admittedly put off writing Emma's birthday post because I find it difficult to put into words what this special little girl means to me. Before Emma was born and it was just my buddy Matthew and I hanging out together, I used to think that I would probably be perfectly content to just be a mother of boys. When I found out I was pregnant again, I remember hoping that the baby would be another boy - and not just because I already had a ton of boys clothes and gear - but because I really had decided in my mind that I wanted to mother an army of little boys. But the minute Emma was born and I held my little girl for the first time, I forgot all about that and tumbled headfirst into a world of pink things, princesses, tutus, ponies, and butterflies and have never once looked back. Now I am a Mom to two precious little girls and I can't imagine life without them! But today, I just want to talk about my Emma.
Since the moment she was born, Emma has been the light of our world. She was our easiest baby by far - in fact, Paul and I briefly nicknamed her "The Baby the World Forgot" because as long as she was fed, we could stick her in her bouncy seat or the swing and she would just sit there contently, looking around or playing with her hands. She slept well at night, was extremely sweet-tempered, and very social. She also seemed to want to grow up a bit too fast - probably because she was in a big hurry to chase after Matthew. There was a time where we kept scolding Matthew for teasing Emma by taking toys from her or knocking her over. However, it wasn't long before we had to protect Matthew from Emma. That girl learned very quickly both how to press her big brother's buttons and how to defend herself from his shenanigans. Her speech was extremely advanced for any of our children and she could speak simple sentences by the time she was a year. It just seemed as if Emma was not a baby very long.
Now she is three years old and I can hardly believe it! She has grown into such a beautiful little girl who loves dresses and skirts, bows and ribbons, tea parties and tiaras. She might love all the fancy and dainty things, but this little girl is also one of the messiest eaters I have ever seen. Every meal time must involve Emma wearing a bib for she will find some way to saturate or stain her outfit! She also has one of the most doggedly determined personalities I have ever encountered. If she wants to button her own shirt, put on her own shoes, or buckle herself into the car seat, you better let her do it because she will fight you to the death. She is also highly picky when it comes to choosing outfits to wear, but thankfully actually has fairly good fashion sense. She loves her shoes, most especially fancy sandals, and always must have accessories with her, including her sunglasses and purse. She loves to read books, especially little small books she can easily stack together, and has recently been into drawing me pictures. If there is a flower growing in the yard, she will pick it. If there is an animal nearby, she will pet it. If there is a child playing nearby, Emma will quickly make friends. Everyone loves Emma and Emma loves everyone!
I can't get enough of her hugs and kisses. Paul and I have always talked about how Emma gives the best hugs. And she does because she puts so much emotion and love into each and every one! I love how she will respond when asked to do something for me, "Oh of course, Mommy!" Or how, in response to hearing me tell her she looks beautiful, she will exclaim: "Oh thank you! That's very nice of you!" When tucking her in at night, she always wraps her arms around me, gives me a sweet kiss, and whispers in my ear, "I love you, Mommy. You are very special to me." My heart almost can't handle the emotion that floods it when I hear her say those words.
She loves to be tickled, hugged, and kissed and her laughter and her smiles are both so incredibly infectious. She also loves to dance, especially one-on-one with her brother as she pretends to be the princess dancing with her prince. She is extremely defensive and caring about her little sister and always refers to her as "Little Lucy". And "Little Lucy" loves and adores her right back.
Don't get me wrong, it is not all rainbows and sunshine with Emma, for she can be the most difficult child when she is in a bad mood. Her extreme stubbornness can be quite challenging at times and she has been known to throw the occasional spectacular tantrum. Thankfully, those have been few and far between. Out of all of our children, she has the most difficult time waking up in the mornings and usually requires a good 45 minutes after actually opening her eyes to truly wake up before she is capable of carrying on a conversation sans grunting and groaning. When we have to wake up early on Sunday mornings for church, Paul and I always brace ourselves before entering Emma's room. We usually begin by opening her door open, allowing the light from the hallway to flood inside and hopefully encouraging her to naturally wake up as she hears the sounds of the rest of the family getting dressed and ready for the day. On more than one occasion, she has simply gotten out of bed, slammed the door shut again, and climbed back into bed to resume her sleep.
But, I wouldn't change a thing about her - her spunk, her spirit, her energy, her zeal for life, her enthusiasm for beauty, her love of others, and her earnest desire to please. Words truly cannot describe what an honor and a privilege it has been to be her mother.
For our special little girl, I wanted to give her a very special birthday. However, this year her birthday fell on Good Friday and since this is a somber day of fasting, it didn't seem right to celebrate with cake, ice cream, and presents. So, we instead just gave her a couple extra hugs and deferred her birthday until the following Tuesday. Obviously, she did not notice or care but we did tease her at breakfast on Easter Sunday by telling her that she was already three.
"No! I'm two! It's not my birthday yet!" she cried.
"Actually, Emma, your birthday was last week but we decided to skip it!" Paul told her.
"What? No! I'm two! That's not true, right Mommy?"
"No Emma....but actually yes."
It was actually rather comical but she insisted that she was two years old until she blew out the candles on her birthday cake. She already has a fear of growing old.
On the day we actually celebrated her birthday, she woke up to find her room filled with two dozen balloons. She came downstairs to find her high chair covered with pink and purple balloons as well as a beautiful tiara and a new Princess Sofia cup. She was in heaven! She immediately put the tiara on (and if I ever called it a "crown" she would vehemently respond that it was not a crown but a tiara!) and began to tell me she was the "Queen of the Day." This made me think I had possibly created a birthday monster. I served her highness strawberry pancakes for breakfast along with chocolate milk in her new Princess Sofia cup. The meal received her royal seal of approval.
We had a great day together - dancing, having a tea party, coloring, and watching her favorite movie Frozen together. However, towards the end of the day, I could see her starting to become tired - and grumpy. I tried to convince her to take a birthday nap, but she was too wound up and excited for presents and cake in the evening. So, she just bounced on her bed for about 45 minutes before I decided the effort was futile.
When Paul arrived home that evening, we headed up to Texas Roadhouse for Emma's birthday dinner. The kids had enjoyed Matthew's birthday dinner so much, that Emma requested the same location for her special day. Of course, being the health-conscious child that she is, she ordered Macaroni and Cheese and fries but barely touched it. Instead, she played with the peanuts and drank her weight in root beer. When the waiters and waitresses came over to give her a birthday "Yee-haw", she whined and moaned the entire time although normally she would eat up that sort of attention. She was definitely tired and beginning to suffer from Too Much Birthday Syndrome. However, she did not leave the restaurant without first having the balloon artist make her the most obnoxious glowing balloon headband.
When we got home, we opened her gifts and she delighted in each and every one. She and her siblings began playing with all her new treasures immediately - which included a new kitchen set, a new outfit and crib for her baby dolls, and a barbie in the likeness of Anna from Frozen. She also received several little sundresses for summer, but those were less exciting to her than the toys. When it was time for cake, nobody sang The Birthday Song louder than the birthday girl herself. Emma loves that song. When Matthew blew out Emma's candles on her cake, we had to light the entire thing again and do the whole ritual all over. After quite a bit of huffing and puffing, blowing and spitting, Emma finally blew out her own candles. And now she is three.
Shortly afterwards, the birthday girl suffered a bit of a sugar coma and had to be escorted to bed a bit early where she slept grandly before uncharacteristically waking up before the sun the next morning just so she could resume playing with all her gifts.
Emma Rose, we love you so much! We pray that you will always remain as sweet and dear as you are today. You are very special to us.
Tuesday, April 12, 2016
Pasta with Ham and Broccoli
The weather has really been toying with us around here. One day we are enjoying beautiful, warm temperatures and sunny skies, and the next day we wake up to several inches of snow covering the ground. The kids have been really confused by all of this. Emma especially was majorly bummed when I told her that she had to exchange the sun dresses she had been sporting for her winter coat and gloves. "I don't like the snow! It freezes me!" she pouted. My thoughts exactly, young lady.
Even though the temperatures have plummeted once more, Paul and I have still kept our windows open in our bedroom. Our room heats up so much at night that the only way to keep it at a temperature that is bearable enough for sleep is to open both the windows. Well, we have yet to put the screens up on our windows and based on the early morning visitors we had last Saturday, it just might be time to get that little chore done. See, we were awoken early on Saturday morning by Matthew who was tapping frantically on Paul's shoulder to tell him that there was a bird trying to get into our room through the cracked window. Paul and I were pretty groggy after a rough, sleepless night with a fussy Lucy and told him to go away and leave us alone for a bit longer. We then tried to get back to sleep but were awoken by this frantic scratching sound coming from the window in our bathroom. We looked up to see a very large robin trying desperately to squeeze its way inside. Thankfully, it was a very fat bird and could only manage to twist itself in halfway before realizing the effort was futile. He did, however, leave a disgusting gift on the inside of our sill before flying away. An examination of the other window where Matthew had seen a bird trying to break in found the same gift. Like I said, those screens are going up!
Here is a great recipe to use up all that ham you might have leftover after making this amazing Cherry-Port Glazed Ham. This is a super simple and quick pasta dish that the whole family will love. You can change it up to suit your personal preferences by adding in some different vegetables, like peas instead of broccoli. Always serve with more cheese on the side for sprinkling on top. That's Emma's favorite part. She always requests a generous layer of "cheese snow" to be strewn over the top of her pasta. Smart girl.
And, if pasta is not really your thing, there is also this awesome soup or these mouth-watering sandwiches. Leftover ham is never a bad thing around here.
Pasta with Ham and Broccoli
adapted from Simply Recipes
3/4 pound shaped pasta of choice
2 tablespoons butter
3 garlic cloves, minced
1 1/2 cups diced ham (or more)
1 1/2 cups broccoli florets, cut into bite-sized pieces and lightly steamed
1/2 cup cream
1 cup of pasta cooking water (reserved from cooking the pasta)
1/2 cup grated Parmesan cheese, plus more for serving
1/2 teaspoon salt
3/4 teaspoon black pepper
Heat 4 quarts of water and 2 Tbsp salt in a large pot for the pasta. Once the water starts to boil, add the pasta and cook at a rolling boil, uncovered, until al dente, cooked through, but still a little firm to the bite (the low end of the cooking times given on the package). Drain, reserving 1 cup of the pasta cooking water.
While you are cooking the pasta, heat the butter in a medium skillet on medium heat until melted. Add the minced garlic and cook for 1 to 2 minutes. Stir in the ham.
Stir in 1 cup of the pasta cooking water. Stir in 1/2 cup of cream, Parmesan cheese, salt, and pepper.
When the pasta is ready, toss it with the sauce in a serving bowl along with the steamed broccoli and serve.
Friday, April 8, 2016
Cherry-Port Glazed Ham
A few weeks ago, I decided to get Emma started with swim lessons. The idea was that she would learn some basics before taking lessons in the outdoor pool during the summer. Paul and I both view swimming as an important life skill and really would like the kids to learn to both love and respect the water. So far, our plans have not been going so great. Matthew lived in perpetual fear of the water for the first five years of his life. He would scream as if someone were chasing him with a chainsaw whenever the bath water was turned on and the strength of both parents was required to pin him down and get him clean. During the hot summer months, he would constantly ask us to turn the sprinklers on but, unlike most kids who enjoy running and jumping in the shooting mists, he would lazily sit back on a lawn chair and just watch the sprinkler move back and forth, occasionally interrupting his reverie to point out a rainbow that formed between the sprays. Going to the pool with him was never an option unless we felt like being clawed and scratched by the surprisingly sharp nails of our pathetic child as he clung to us like a baby monkey.
Then, Emma came along and seemed to gradually help Matthew face his fear of water. When Emma began loving the bath, suddenly Matthew became more accepting of it. When Emma loved going to the pool and seemed to have a lot of fun splashing and playing in the water, Matthew began to venture into the water without prodding. However, he was still overall very wary when it came to getting his head wet or getting in deeper than his belly button. Thankfully, enrolling him in swim lessons last summer seemed to solve that. Now, he was probably the laziest student ever because the swim instructor would take each child one by one off the wall and help them "swim" from one side of the pool to the other. The only thing the child had to do was kick their feet to aid in propelling themselves forward. Matthew would just hang back and enjoy the free ride, his legs remaining limp in the water. However, by the end of his lessons he did manage to dunk his entire head under water and no longer seemed afraid of hanging out in the pool. In fact, he loves going to the pool now. So, we are going to keep up the swim lessons with him this summer with the hope that he will now develop some actual technique. We shall see.
Back to Emma. The girl loves water in any form. We actually need to give Emma lidded cups because she simply cannot control herself around open containers of liquid - she must plunge her fingers in and swirl and splash about, making a gigantic mess. So, I felt that Emma was old enough to begin learning how to actually swim and figured that she would perhaps do even better than Matthew since she has no fear when it comes to water. When registering her for the lessons, she was actually too young to make the cut-off but a friend of mine who works at the YMCA managed to put in a good word for us and got her into the class.
After all that effort, I am embarrassed to report that Emma's lessons have thus far been a mixture of disaster and frustration. Emma is the youngest in the class by about two years - and it shows. She has no attention span. When the instructor is talking, I can see her little eyes wandering about completely unfocused on the lesson. I have had to corral her back to her lesson a couple of times because she will begin to move down the wall away from the lesson area because she is bored and doesn't feel like being there anymore. At one point, she slipped under the rope separating the pool to go into the more shallow area because she saw that some girl had brought in a Disney princess water toy and she wanted to inspect it. The instructor counted the number of kids on the wall and noticed that one child was missing and freaked out for a minute before seeing Emma sitting about 30 feet away in the shallow area of the pool playing with the princess water toy. She was not happy when he went to retrieve her and took off her life vest and threw it at him. I was mortified. All this happened on the first day.
For her second lesson, things went slightly better in that Emma did not do any retreating from the lesson. She seemed to be paying attention and even enjoying herself, although she did spend a little too much time splashing this other little boy in her class. The kids were learning how to float on their back during this particular lesson and when it came time for Emma's turn to float on her back with the aid of the instructor, she seemed to be doing really well! I began to relax and thoughts of how proud I was of my brave little daughter began floating through my head. This was all very short-lived, for I noticed the instructor suddenly grab Emma and motion me over as he raced her to the side of the pool. Apparently while she had been casually floating along, she had informed her instructor that she "had to go poop." Such a lady. So, suddenly I found myself dragging her to the bathroom as fast I could where, go figure, nothing happened. She returned to her swim lesson (after much struggle to get her suit back up!!) and then, about five minutes later, loudly proclaimed her need to relieve herself, and the scenario repeated. This happened two more times and then her lesson was over. By the end, I was exhausted, Emma still had yet to actually use the bathroom, and the major accomplishment of the entire lesson was that Emma had floated on her back for about 15 seconds. I came home to spout my frustrations to Paul, who found the entire situation incredibly funny. We have another lesson today so we will see what mischief she cooks up.
With all the drama these little ones add to life, some things like mealtime have to be kept more simple. This is one of the reasons why we have been eating a lot of ham lately. We bought a bunch of hams around Christmas time because our grocery store was basically giving away their holiday ham surplus. Ham, along with turkey, is one of the few meats that the kids could eat every single day and never tire of it. I think it's the salt content, but whatever the reason I know that I can serve ham for dinner and there will be no complaints. And sometimes, at the end of the long day, this tired Mama just wants to sit down and eat a meal without hearing incessant whines about how boxed, neon-colored cheese pasta tastes so much better than the swill currently being passed off as dinner.
Of all the ways we have been cooking ham, this Cherry-Port Glazed Ham is the absolute best version. Now, the sauce is out-of-this-world fantastic and complements the ham beautifully, but even if you do not choose to make the sauce, the cooking method for the ham ensures a moist, juicy product. Too often, glazed hams end up being a bit dry. Not the case with this recipe! This is the only technique we will be employing in the future when it comes to our spiral-sliced hams. We served this for our Easter dinner and it was a big hit! No complaining, just some happy munching from the baby to the Kindergartner!
Cherry-Port Glazed Ham
from Cook's Illustrated, November 2007
Note:You can bypass the 90-minute soaking time, but the heating time will increase to 18 to 20 minutes per pound for a cold ham. If there is a tear or hole in the ham's inner covering, wrap it in several layers of plastic wrap before soaking it in hot water. Instead of using the plastic oven bag, the ham may be placed cut-side down in the roasting pan and covered tightly with foil, but you will need to add 3 to 4 minutes per pound to the heating time. If using an oven bag, be sure to cut slits in the bag so it does not burst.
For the Ham:
1 spiral-sliced, bone-in half ham (7 to 10 pounds)
1large oven bag (plastic)
For the Cherry-Port Glaze:
½ cup ruby port
½ cup cherry preserves (we used Bonne Maman)
1 cup packed dark brown sugar
1 teaspoon ground black pepper
Leaving ham's inner plastic or foil covering intact, place ham in large container and cover with hot tap water; set aside for 45 minutes. Drain and cover again with hot tap water; set aside for another 45 minutes.
Adjust oven rack to lowest position and heat oven to 250 degrees. Unwrap ham; remove and discard plastic disk covering bone. Place ham in oven bag. Gather top of bag tightly so bag fits snugly around ham, tie bag, and trim excess plastic. Set ham cut-side down in large roasting pan and cut 4 slits in top of bag with paring knife.
Bake ham until center registers 100 degrees on instant-read thermometer, 1 to 1 1/2 hours (about 10 minutes per pound).
While the ham is baking, make the Cherry-Port Glaze. Simmer port in small saucepan over medium heat until reduced to 2 tablespoons, about 5 minutes. Add remaining ingredients and cook, stirring occasionally, until sugar dissolves and mixture is thick, syrupy, and reduced to 1 cup, 5 to 10 minutes; set aside.
Remove ham from oven, transfer to cutting board, and brush entire ham with another third of glaze. Let ham rest, loosely tented with foil, for 15 minutes. While ham rests, heat remaining third of glaze with 4 to 6 tablespoons of ham juices until it forms thick but fluid sauce. Carve and serve ham, passing sauce at table..
Monday, April 4, 2016
Carrot Layer Cake from Momofuku Milk Bar
I have a new baker crush. Ever since I picked up her Milk Bar Cookbook from the library on a whim, I have been engrossed with Christina Tosi's recipes. Most of America will probably recognize Chef Tosi from her appearance as a judge on Masterchef, but she is renowned for her incredibly successful and groundbreaking desserts served at the wildly popular Momofuku Milk Bar in New York City. Her desserts certainly deserve the notoriety they have received. They are unique, whimsical, and complex. Milk Bar is a fitting name for her bakery since every recipe prominently features milk in some way, shape, or form. Her layer cakes were what caught my eye first, but her cookbook is filled with enticing recipes for cookies, breads, pies, and ice cream. Everything looked good. Well, everything except the recipe for "Cereal Milk". I know lots of people, my children included, who look forward to slurping up the sugary, color-tinged milk leftover from a large bowlful of Lucky Charms, Fruit Loops, or Cinnamon Toast Crunch, but that has always been my least favorite part of cereal for breakfast. Making an entire quart full of milk reminiscent of that experience certainly did not appeal.
But her cakes! Her beautiful layer cakes! Each one is a exquisite combination of several different components that, when stacked and mingled with one another, create an intriguing combination of sweet, salty, crunchy, and creamy. Each one is a masterpiece. And, like most masterpieces, the cakes require a bit of time and patience. The good news is that none of the steps are particularly difficult - actually, everything is quite simplistic - there are just a LOT of them. I started making my first cake - this beautiful Carrot Layer Cake - over a week before I planned to serve it for Easter Sunday. Thankfully, all the components can be frozen or refrigerated for a period of time, making your life a lot easier. I worked on this cake after the kids were in bed and I found it to be a really fun and relaxing experience! Paul also had some engineering work to do during the same time, so we just put on a Ken Burns documentary and both worked away in the kitchen, me at the counter and him at the table. It was fun, productive, and we both learned a lot about how the West was settled. Major takeaway: we should never complain about how tough life is now compared to back then.
All of the Milk Bar cakes are built inside a mold constructed from acetate strips and a 6-inch cake ring. This allows everything to be stacked neatly together while leaving the sides of the cake completely exposed. It's a nifty look that I personally love. I chose to embellish the top of our cake with some mini cadbury eggs and a little chocolate bunny because it was for Easter! Of course when I revealed the cake to the kids, they immediately started arguing over which one of them was going to consume the chocolate bunny on top. Because of course that's the part to focus on!
I loved this cake. Loved it. It is very, very rich and easily serves about 10 people even though it is only a 6-inch layer cake. My favorite part of the whole cake was the graham cracker crust frosting. It was one of the greatest things I have ever eaten and went so well with the cake! I normally have a "take it or leave it" attitude when it comes to carrot cake, but I will be hoarding the leftovers of this treat in my fridge. I can't wait to make another Milk Bar cake - and I think you should make one too! Again, don't be intimidated by the length of the recipe and some of the specialty ingredients you might have to find. Nothing is too expensive and can easily be found on Amazon. If you enjoy baking, you will love making this cake.
Carrot Layer Cake
from Momofuku Milk Bar
Note: I detailed the recipe below in the order that I made each of the components. Also, I weighed all my ingredients in order to get the flavor as close as the Milk Bar as possible but included the common measurement equivalent for those who do not own a kitchen scale.
For the Milk Crumb:
40 g (1/2 cup) milk powder
40 g (1/4 cup) all-purpose flour
12 g (2 tablespoons) cornstarch
25 g (2 tablespoons) granulated sugar
2 g (1/2 teaspoon) kosher salt
55 g (4 tablespoons, 1/2 stick) butter, melted
20 g (1/4 cup) milk powder
90 g (3 ounces) white chocolate
Combine the 40 g (1/2 cup) milk powder, the flour, cornstarch, sugar, and salt in a medium bowl. Toss with your hands to mix. Add the melted butter and toss, using a spatula, until the mixture starts to come together and form small clusters.
Spread the clusters on a sheet pan lined with parchment paper, and bake for 20 minutes. Remove from oven and cool completely.
Crumble any crumb clusters that are larger than 1/2 inch in diameter, and put crumbs in a medium bowl. Add the 20 g (1/4 cup) milk powder and toss together until it is evenly distributed throughout the mixture.
Melt the white chocolate in a heatproof bowl set over a pot of simmering water. Pour the melted white chocolate over the crumbs and toss until your clusters are completely coated. Continue tossing them every 5 minutes until the white chocolate hardens and the clusters are no longer sticky.
The crumbs can be stored in an airtight container in the fridge or freezer for up to 1 month.
*Makes about 260 g (2 1/4 cups)
For the Liquid Cheesecake:
225 g (8 ounces) cream cheese
150 g (3/4 cup) granulated sugar
6 g (1 tablespoon) cornstarch
2 g (1/2 teaspoon) kosher salt
25 g (2 tablespoons) whole milk
1 large egg
Preheat oven to 300°F.
Place the cream cheese in the bowl of a stand mixer fitted with the paddle attachment and mix on low speed for 2 minutes. Scrape down the sides of the bowl with a spatula. Add the sugar and mix for 1 to 2 minutes, until the sugar is completely incorporated. Scrape down the sides of the bowl.
Whisk together the cornstarch and salt in a medium bowl. Whisk in the milk in a slow, steady stream. Whisk in the egg until everything is thoroughly combined.
With the mixer on medium-low speed, stream in the egg mixture. Paddle for 3 to 4 minutes, until the mixture is smooth and loose. Scrape down the sides of the bowl.
Line the bottom and sides of a 6″x6″ baking pan with plastic wrap (I used a 6″ round Pyrex, and had to bake it a bit longer, but it worked fine). Pour the cheesecake batter into the pan, put the pan in the oven, and bake for 15 minutes. Gently shake the pan. The cheesecake should be firmer and more set at the edges, but still jiggly and loose in the center. If the cheesecake is jiggly all over, cake for 5 minute intervals until it is done. If the cheesecake rises more than 1/4 inch or begins to brown, take it out of the oven immediately. Cool completely before using.
The cheesecake can be stored in an airtight container in the fridge for up to 1 week.
Makes about 325 g ( 1 1/2 cups)
For the Carrot Cake:
115 g (8 tablespoons, 1 stick) unsalted butter, at room temperature
120 g (1/2 cup tightly packed) light brown sugar
100 g (1/2 cup) granulated sugar
2 large eggs
40 g (1/4 cup) grapeseed oil
200 g (1 1/4 cups) all-purpose flour
4 g (1 teaspoon) baking powder
1.5 g (1/4 teaspoon) baking soda
1.5 g ( 3/4 teaspoon ground cinnamon
5 g (1 1/4 teaspoons) kosher salt
225 g (2 1/2 cups) shredded peeled carrots (about 2 to 3 medium-sized carrots)
Nonstick cooking spray
Preheat oven to 350 F.
Combine the butter and both sugars in the bowl of a stand mixer fitted with the paddle attachment, and cream together on medium-high for 2 to 3 minutes. Scrape down the sides of the bowl, add the eggs, and mix on medium-high for 2 to 3 minutes. Scrape down the sides of the bowl.
On low speed, stream in the oil. Increase the speed to medium-high and paddle for 4 to 6 minutes, until the mixture is almost white, twice the size of your fluffy butter and sugar mixture, and there are no streaks of fat. Stop the mixer and scrape down the sides of the bowl.
On very low speed, add the flour, baking powder, baking soda, cinnamon, and salt. Mix for 45 to 60 seconds, just until the batter comes together and all the dry ingredients have been incorporated. Scrape down the sides of the bowl.
Remove the bowl from the mixer, dump in the shredded carrots, and fold them into the batter with a spatula.
Spray a quarter sheet pan with nonstick spray and line with parchment paper. Using a spatula, spread the cake into an even layer in the pan.
Bake the cake for 25 to 30 minutes. At 25 minutes, gently poke the edge of the cake with your finger. The cake should bounce back slightly and the center should no longer be jiggly. Bake for another 3 to 5 minutes if necessary.
Remover the cake from the oven and cool completely in the pan on a wire rack (or place it in the fridge or freezer to cool quickly).
The cooled cake can be stored in the fridge, wrapped in plastic wrap, for up to 5 days.
For the Graham Crust:
190 g (1 1/2 cups) graham cracker crumbs
20 g (1/4 cup) milk powder
25 g (2 tablespoons) granulated sugar
3 g (3/4 teaspoon) kosher salt
55 g (4 tablespoons, 1/2 stick) unsalted butter, melted (plus additional if needed)
55 g (1/4 cup) heavy cream
Toss the graham crumbs, milk powder, sugar, and salt with your hands in a medium bowl until ingredients are evenly distributed.
Whisk together the butter and heavy cream. Add to the dry ingredients and toss well, until evenly distributed. the mixture should hold its shape if squeezed tightly in your hand. If it’s not moist enough to do so, melt an additional 14 to 25 g (1 to 1 1/2 tablespoons) butter and mix it in.
Use immediately, or store in an airtight container for 1 week at room temperature or 1 month in the fridge of freezer.
Makes about 340 g (2 cups)
For the Graham Frosting:
1/2 recipe Graham Crust (above)
85 g (1/3 cup) whole milk
2 g (1/2 teaspoon) kosher salt
85 g (6 tablespoons) unsalted butter, at room temperature
15 g (1 tablespoon tightly packed) light brown sugar
10 g (1 tablespoon) confectioners’ sugar
.5 g (1/2 teaspoon) ground cinnamon
.5 g (1/8 teaspoon) kosher salt
Combine the graham crust, milk, and salt in a blender, and pure until COMPLETELY smooth, 1 to 3 minutes depending on your blender.
Combine the butter, sugars, cinnamon, and salt in the bowl of a stand mixer fitted with the paddle attachment, and cream together on medium-high speed for 2 to 3 minutes, until fluffy. Scrape down the sides of the bowl.
On low speed, mix in the contents of the blender. After 1 minute, turn the mixer up to medium-high and beat for another 2 minutes. Scrape down the sides of the bowl.If the mixture is not a uniform pale tan, beat for another minute or so at medium-high speed, and scrape down the bowl again.
Use immediately, or store in an airtight container in the fridge for up to 1 week.
Makes about 230 g (1 cup)
To Assemble the Carrot Layer Cake:
1 recipe Carrot Cake (above)
Whole milk
1 recipe Liquid Cheesecake (above)
1/2 recipe Milk Crumb (above)
1 recipe Graham Frosting
1 (6″ by 3″ cake ring)
2 (3″ by 20″) acetate strips
Place a piece of parchment paper on the counter. Invert the cake onto it, and peel the parchment from the bottom of the cake (you may need to run a knife around the cake before releasing it from the pan). Use the cake ring to stamp out 2 circles from the cake (as if you were using a giant cookie cutter; see photo below). These are your top 2 cake layers. The remaining cake scraps will be your bottom layer.
Clean the cake ring and place it in the center of a sheet pan or cutting board lined with a clean piece of parchment paper. Use 1 acetate strip to line the inside of the cake ring.
Put the cake scraps inside the ring and use the back of your hand to push them down into an even layer. Don’t worry if it doesn’t look nice—once it’s covered up no one will ever know.
Using a pastry brush, brush the cake layer with a good dose of milk (not too much, or it will leak out of the bottom of the cake).
Use the back of a spoon to spread half the liquid cheesecake in an even layer over the cake.
Sprinkle 1/3 of the milk crumbs over the cheesecake. Tap them gently with the back of your hand to anchor them in place.
Use the back of a spoon to spread 1/3 of the graham frosting as evenly as possible over the crumbs (I found it really hard to spread frosting over the cheesecake and crumbs, so I just dolloped it evenly over them).
With your index finger, gently tuck the second acetate strip between the cake ring and the top 1/4 inch of the first strip of acetate (see photo below), so that you have a clear ring of acetate 5 to 6 inches tall. Set another cake round on top of the frosting, and repeat the process from the first layer (the rest of the cheesecake, half of the remaining milk crumbs, and half of the remaining frosting).
Top with the last cake round. Cover the top of the cake with the remaining frosting, smoothing it out. Garnish with the remaining milk crumbs, gently nestling them into the frosting.
Cover with plastic wrap, transfer the sheet pan or cutting board to the freezer, and freeze for a minimum of 12 hours to set the cake and filling. You can keep the cake in the freezer like this for up to 2 weeks.
At least 3 hours before you are ready to serve the cake, remove it from the freezer, and using your fingers and thumbs (pushing against the bottom of the cake), pop the cake out of the cake ring. Gently peel off the acetate, and transfer the cake to a cake stand or serving plate. Allow the cake to defrost in the fridge for at least 3 hours.
Cake can be kept, wrapped well in plastic, for up to 5 days.
Friday, April 1, 2016
Hot Cross Buns with White Chocolate and Orange
It took me a couple years of biting into many a stale and dense Hot Cross Bun for me to come to the conclusion that I just really don't like them. Most of the time, the buns turn out very unexciting in both taste and texture - more akin to last-night's dinner rolls rather than a fresh breakfast pastry. Of course they are traditionally eaten on Good Friday so perhaps the secret purpose of eating these buns is to serve as a penance of sorts. Either way, I very much appreciate the tradition and symbolism behind the making of Hot Cross Buns, just not the results of most recipes I have tried over the years.
This Holy Week, I decided to make Hot Cross Buns again, only this time I would take a completely non-traditional approach and just make what I think a sweet morning bun should taste like. Paul and I decided to completely abstain from eating on Good Friday, so after I no longer had the distraction of children to keep my mind off my hunger, I decided to spend the hours after bedtime making these rolls. I timed it just right so that I would be able to "sample" my creation when they emerged from the oven shortly after midnight. What a great way to celebrate the end of our fast!
For the buns, I used the sweet dough from my favorite cinnamon roll recipe and amped up the flavor a bit by incorporating orange zest into the sugar until the sweet citrus oils were released. Then, I threw in a generous couple handfuls of dried cranberries and white chocolate. I omitted cinnamon, a spice added to more traditional recipes for Hot Cross Buns, but I'm sure it could still be included if so desired with pleasant results. The dough enjoyed a luxurious two-hour rise before being shaped and set aside to rise once more. Because of the amount of sugar in the dough, the rising process will be a little slower than for leaner doughs. Don't rush the process! The longer rises just mean more developed flavor and a softer, more pillowy dough texture in the end!
After the second rise, the buns were ready for to bake! While they browned, my kitchen smelled like heaven. After they finally emerged, it was really hard to resist biting into a piping hot roll - and scalding my mouth in the process! I distracted myself by making an orange glaze to use for piping crosses onto the cooled rolls. I had to beat Paul away from the glaze with my whisk - he could not resist eating it. He might have been a bit rabid from hunger at this point, but the glaze is really very good! The next morning, Matthew even requested extra glaze be applied to his roll. Apparently, I was too stingy with it!
In the end, these were the best Hot Cross Buns I have ever had. The white chocolate melts into the dough, imparting a pleasant, creamy, vanilla flavor to the dough that pairs so well with the orange zest and cranberries. Even if you're not a fan of white chocolate, I implore you to give this combination a chance! The kids were obsessed with the buns - Matthew especially. He declared them the best thing I ever made. I have to agree that they are pretty fantastic. Certainly too good to enjoy only once a year. We'll be making these again soon.
Hot Cross Buns with White Chocolate and Orange
For the Dough:
2 cups whole milk (do not use anything less than 2%)
1 stick butter
2/3 cup sugar
Zest of 1 Orange
1 1/4 teaspoons salt
1 tablespoon instant yeast
2 large eggs
5 1/2 - 6 1/2 cups unbleached all-purpose flour
1 cup dried cranberries
3/4 cup white chocolate
For the Glaze:
3 cups powdered sugar
2 teaspoons orange zest
3 tablespoons fresh orange juice
Pinch of Salt
Additional powdered sugar as needed
In a small bowl, rub the orange zest and sugar together with your fingertips until the oils of the orange are released and become very fragrant. Set aside.
Heat the milk in a medium saucepan until the milk is very warm and bubbles have formed around the outside. Pour the milk into the bowl of an electric stand mixer fitted with the dough hook.
Add the butter, sugar and salt. Mix until the butter is melted and let the mixture cool until warm but not hot.Add the yeast and eggs and mix until combined.
Gradually add the flour until the dough clears the sides of the bowl. The dough should be soft and just slightly sticky without leaving a lot of residue on your fingers. Add the cranberries and white chocolate and knead to incorporate. Continue to knead for 5-10 minutes or until the dough is soft, pillowy, and bounces back slightly when pressed or squeezed.
Transfer the dough to a large, lightly greased bowl. Cover with lightly greased plastic wrap and let it rise until doubled. This might take a bit of time - I let mine rise for about two hours.
After the first rise, punch the dough down and separate it into 12-16 even pieces, depending on how big you want your finished rolls to be. Roll each piece into a ball and place on a parchment-lined half sheet pan. Cover with parchment and let rise once more until puffy and doubled. This took a little less time than the first rise.
Meanwhile, preheat the oven to 350 degrees.
Bake the rolls for 18-22 minutes, or until golden. I like to brush mine with a beaten egg yolk halfway through baking to impart a more golden hue to the buns. When finished, remove from the oven and allow to cool on a wire rack before glazing.
To make the glaze, whisk together all the ingredients until smooth. Add more powdered sugar or liquid until you reach the consistency you desire. Pipe crosses over the top of the buns or simply spoon the glaze all over.
Serve and try not to eat the whole pan.
Subscribe to:
Posts (Atom)