Pages

Wednesday, April 30, 2014

Embarassingly Simple Funfetti Blondies


As the school year comes to a close, so does my time teaching Religious Education to my little group of 2nd graders. Last week, I told my kiddos that I wanted to bring in a special treat for our last class together and asked them all to think of what dessert they would like. After several very serious minutes of intense thinking - I do not recall them giving any of our class projects such sincere mental effort - they responded unanimously: "Something with sprinkles."

Sprinkles? 

What is it with kids and sprinkles? Sprinkles are relatively tasteless, get stuck between your teeth, and never stay stuck to the cake, doughnut, cookie, whatever. On the rare occasion that we pay a visit to a bakery for some morning pastries, Matthew always insists on choosing a doughnut with sprinkles. And those dang sprinkles fall everywhere and wedge themselves in every nook and cranny of our kitchen floor. I find myself sweeping them up days after that doughnut was devoured. I hate sprinkles.

Why do kids love them? 

After my kiddos gave me their request, I asked them why they liked sprinkles on everything. Here are some of their responses:

1. "They are pretty."
2. "They remind me of a rainbow!"
3. "I like to eat one sprinkle at a time. The red ones taste the best."
4. "Sprinkles remind me of my birthday."
5. "Sprinkles are awesome!"
6.  And Matthew's contribution: "Monkey eats the sprinkles." His answer makes the most sense, does it not?

The general consensus: The sprinkles make my kids happy. So sprinkles they shall get - in the form of these Funfetti Blondies!

Now, since I have to make four batches of blondies I took the easy route and used a box mix to make these. I know - totally cheating. But the bottom line is, the little kids do not care that I did not make these completely from scratch and making a bunch of blondies using a boxed mix saves me a lot of time and energy. But don't get me wrong - these are still pretty delicious. Filled with sprinkles and white chocolate pieces, they taste like gooey pieces of cake batter. They are pretty addicting - especially once chilled. For some reason I liked them better that way. 

If you're looking for a sprinkle fix, these blondies certainly fit the bill. I think my kids are going to go crazy for these. Literally crazy. Kids turn into little maniacs while high on sugar. Of course, the best part about sugar highs is that they normally end like this:


Funfetti Blondies

1 box Funfetti Cake Mix
1/4 cup oil
1 egg
1/2 cup milk
1/2 cup white chocolate chips
1/3 cup sprinkles

Preheat the oven to 350 degrees. Grease a 8x8 pan. 

Pour the cake mix into a large bowl. In a separate bowl, whisk together the oil, egg, and milk. Make a well in the center of the dry ingredients and add the oil mixture. Fold together with a spatula until well combined. Add the chocolate chips and half the sprinkles and fold together until evenly distributed. Top with more sprinkles.

Bake in the preheated oven for 25-30 minutes (I take mine out usually at 25 minutes on the dot). The blondies will not brown and the center will be very soft. That's what you what - these will set up as they cool!

Let them cool completely on a wire rack. I like to transfer mine to the fridge or freezer to chill before slicing - it makes it much, much easier!

Cut into squares, eat, and be happy.

Monday, April 28, 2014

Freezer Biscuits


My favorite part of a holiday meal is the fresh homemade bread.

Ironically, my least favorite part of the holiday meal to make is fresh homemade bread.

Normally I LOVE baking bread. Everyone in this household loves fresh bread so I know the effort will be worth it in the end because we can use it for so many meals in so many different ways. It also helps that Paul's face lights up when he smells bread baking after coming home from work. However, in planning a holiday meal, it is always an absolute pain coordinating getting the meat, vegetables, and side dishes all piping hot and to the table at the same time while simultaneously ensuring that the bread is risen, baked, and served immediately upon removal from the oven (because we all know that's when it tastes the best!).


Enter these amazing freezer biscuits. Who does not love a good biscuit? Biscuits themselves are not difficult to make, but they do involve a little bit of work - including messing up the counter-top with flour for dusting. Plus, they normally have to be baked immediately after shaping and nobody wants to be forming the dough and cutting out biscuits during the dinner prep crunch time. And now that the weather is warmer, there are tons of other things you could be doing instead of waiting around for the dough to finish rising.

Like taking the kids for a bike ride...


Or for a walk by the lake (yes, that lake is frozen behind us, but the temperature was actually quite warm!)...


These cream-based biscuits are formed, cut, and then frozen until solid. After that, they may be placed in a ziploc bag and stored in the freezer for up to a month before baking. Then, all you have to do is ensure that your oven is preheated to 450 degrees and then toss these bad boys on a baking sheet for 20-25 minutes. They will rise and bake until perfectly browned and flaky. Surprisingly, they taste pretty buttery even though there is no actual butter in the recipe. Well, there is heavy cream - which I guess you could say is butter's close relative. Anyway, these biscuits have been a life saver for me on multiple occasions - Thanksgiving, Easter, dinner parties, you name it...

If you want a less stressful way to serve hot, freshly baked bread at your table, these little beauties might just be your ticket!


Freezer Biscuits
adapted from Cook's Illustrated

6 cups (30 ounces) all-purpose flour, plus extra for the counter
2 tablespoons sugar
2 tablespoons baking powder
1 1/2 teaspoons salt (I sometimes add a pinch or two extra because I think they are a bit under-salted)
4 1/2 cups heavy cream

Whisk the flour, sugar, baking powder, and salt together in a large bowl. Stir in the cream with a wooden spoon until a dough forms, about 30 seconds. Turn the dough out onto a lightly floured counter and gather into a ball. Knead the dough briefly until smooth, about 60 seconds, adding extra flour as needed if the dough is too sticky.

Pat the dough into a 3/4-inch-thick circle. Cut out the biscuits using a 2 1/2-inch round biscuit cutter. Lay the biscuits on a parchment-lined baking sheet, spaced about 1/2 inch apart. Gather up the scraps of dough and re-knead them briefly to combine, then pat the dough again into a 3/4-inch-thick round and cut more biscuits. Repeat this process as necessary with remaining dough scraps.

Wrap the baking sheet tightly with lightly greased plastic wrap and freeze the biscuits until frozen solid, about 6 hours. Transfer the frozen biscuits to a large zipper-lock bag and freeze for up to 1 month. Do not thaw before baking.

When ready to bake, adjust an oven rack to the upper-middle position and heat the oven to 450 degrees. Lay the biscuits on a parchment-lined baking sheet, about 2 inches apart, and bake until puffed and golden brown, about 20-25 minutes. Serve immediately!

Thursday, April 24, 2014

Carrot Cake Cheesecake


I have had this recipe bookmarked for a while. While trying to decide on what to serve for dessert on Easter Sunday, I had to eliminate our usual Strawberry Cream Cake or Strawberry-Rhubarb Crisp since Catherine has such a deep-seeded hatred of strawberries. I hear she also hates puppies, kittens, rainbows, and sunshine...but to each his (or in this case, her) own. Maybe I should stop picking on poor Catherine since I have already done so here.

Anyway, Catherine loves carrot cake and I hear she is famous for making one for Easter last year. She also loves cheesecake of any kind - it was normally her birthday dessert request while we were growing up. I remembered that I had bookmarked the recipe for this Carrot-Cake Cheesecake and sent the link over to Catherine for approval. She immediately wrote back: "Oooh. Let's do that!"

So, Matthew and I made this beautiful dessert on Good Friday. In the future, I will try not to make food preparations for Easter on Good Friday since I am normally fasting. This Good Friday, Paul and I had the crazy idea to do a 24 hour fast together. It was really rough. I was so darn hungry while making this dessert that I debated whether eating the butter wrappers would count as actual food. But, I managed to exercise some extreme will power and resisted the urge to eat paper. Matthew had to taste all the components as we baked away - and everything met with his approval - perhaps even a little too much. I had to save the cake at multiple times during the baking process. At one point, Matthew was spooning so much cake batter (raw eggs!!!) that I had to ban him from his perch atop the counter (and no, he was certainly not participating in the fast - I think he was just eating more than usual that day to torture Paul and me). When we stuck a toothpick into the center of the cake to test for doneness, he thought that was an invitation to take a bite - so he grabbed a fork and was about ready to start on his afternoon snack before I flew across the room just in time. I explained to him that we had to wait for Aunt Catherine to come before eating the cake.

"Oh yes. It's for Aunt Catherine! Aunt Catherine is coming to our house!" He replied happily. He seemed to understand and kept talking about how excited he was to give Aunt Catherine her cake.

Fast forward two days and it is the end of our Easter feast and we are ready for dessert. I call to Matthew to come back to the dinner table because it is now time for cake. He comes racing across the room at full speed: "OK Mommy! It's time for Aunt Catherine's cake!"

We pulled it out of the fridge, unwrapped it, and set it on the counter-top. I was about to cut into it when Matthew cried: "No Mommy! You forgot! Aunt Catherine needs to blow out the candles on her birthday cake!"

Apparently, Matthew thought that when I told him we were making the cake "for Aunt Catherine" that we were in fact making the cake for Aunt Catherine's birthday. Which was in January. Nowhere near April 20th.

But, to appease the boy, Paul rummaged around and found a single, pathetic pink candle leftover from Emma's birthday party and handed it to Matthew. We thought he would choose to set it in the center of the cake where we had made a little "nest" of toasted coconut and chocolate malt ball eggs - but no. Instead, he stuck it completely off center.

Bullseye, Matthew.
"You light it, Daddy!" he instructed Paul and then headed over to climb on Aunt Catherine's lap. Matthew led us in a round of "the birthday song" as I held the cake in front of Catherine. We were all cracking up during the entire song - it was just too funny. At the end of the song, Aunt Catherine leaned in to blow out her candle, but Matthew beat her to it. Nothing says "yummy" like a fresh spray of saliva over the top of a cake.

We couldn't stop laughing while singing to our fake birthday girl.

Aunt Catherine (and the rest of us) loved this cake. It was absolutely delicious - a moist carrot cake swirled with vanilla cheesecake and topped with a rich, tangy cream cheese frosting. It was not too sweet - which I very much appreciated after such a heavy meal - and everyone seemed to love it. Little Matthew ate his in stages - first the frosting, followed by the cheesecake layer a couple hours later, and then the carrot cake portion for breakfast. Weirdo.

Happy 26.279th birthday, Catherine!

The evenng of Easter Sunday, I received a note from one of my dearest friends from high school with a link to this recipe urging me to make it. I thought it was so funny that she had been enjoying this same dessert for Easter. This recipe is a popular one for good reason - it is truly amazing. If you are a lover of cheesecake or carrot cake - you will adore Carrot Cake Cheesecake. Am I trying too hard to convince you of the awesomeness of this cake? Just make it already and experience it for yourself.


Carrot Cake Cheesecake
adapted just slightly from Mel's Kitchen Cafe

For the Cheesecake Layer:
2 (8-ounces each) packages cream cheese, room temperature
1/2 cup granulated sugar
2 large eggs
1 teaspoon flour
1 teaspoon vanilla extract
1/2 cup sour cream

For the Carrot Cake Layer:
3/4 cup vegetable or canola oil
1/4 cup packed light brown sugar
3/4 cup granulated sugar
2 large eggs
1 teaspoon vanilla extract
1 1/4 cups all-purpose flour
1/2 teaspoon baking soda
3/4 teaspoon cinnamon
1/4 teaspoon nutmeg
1/4 teaspoon salt
1 heaping cup finely grated carrots

For the Cream Cheese Frosting:
3 ounces cream cheese, room temperature
2 tablespoons butter, softened
1 1/2 cups powdered sugar
1 teaspoon vanilla
1 tablespoon sour cream

For the cheesecake layer, beat the cream cheese and sugar together with a stand mixer until creamy. Add the eggs and flour and continue beating until smooth. Add the vanilla and sour cream and mix just until blended. Transfer the cheesecake layer to a medium bowl and set aside. Wipe out the bowl of the stand mixer for use in mixing the carrot cake layer.

For the carrot cake layer, whisk together the flour, baking soda, cinnamon, nutmeg, and salt in a medium mixing bowl. Set aside. In the bowl of the stand mixer beat together the oil, brown sugar and granulated sugar until smooth. Add the eggs one at a time and then the vanilla. Beat until the mixture is creamy and light colored. Stir in the flour mixture just until combined. Gently fold in the carrots.

Preheat the oven to 350 degrees. Lightly grease a 10-inch springform pan with butter. Spread half of the carrot cake batter into the bottom of the prepared pan. Dollop half of the cheesecake batter on top of the carrot cake layer in large spoonfuls. Carefully dollop the rest of the carrot cake batter on and around the spoonfuls of cheesecake batter. Do not spread or swirl the batters together. Spread the last half of the cheesecake batter on top of all the layers and use an offset spatula to gently spread into an even layer. Tap the pan on the counter a couple of times to get rid of any air bubbles.

Bake the cheesecake for 55-70 minutes just until the very center of the cheesecake still jiggles slightly when the pan is moved. Begin checking the cheesecake regularly at the 50 minute mark, being sure to tent the top of the cheesecake with foil if it looks like it is browning too quickly.

Remove the cheesecake from the oven and allow to cool completely on a wire rack. Once cool, transfer the cheesecake to the fridge to chill slightly while you make the frosting.

To make the frosting, beat together the cream cheese and butter with a stand mixer set on medium speed until creamy and smooth. Gradually mix in the powdered sugar a little at a time. Crank the machine up to medium-high and beat the frosting until it is very creamy and almost fluffy, about 5 minutes. Add the vanilla, pinch of salt and sour cream and beat well.

When the cheesecake feels slightly cold to the touch, spread the frosting evenly over the top of the cheesecake. Immediately place in the fridge to firm for about an hour and then tightly wrap the pan in plastic. Keep the cheesecake refrigerated until ready to serve. This cheesecake is awesome when made in advance so the flavors really have the chance to meld together. Enjoy!

Tuesday, April 22, 2014

Smoked Salmon Deviled Eggs (and an Easter Sunday Recap)


We had a fantastic Easter weekend - thanks in no small part to the beautiful weather that seems to finally be here to stay. We had the pleasure of celebrating with my sister and her husband-to-be. Matthew was so darn excited during the days leading up to Aunt Catherine's arrival, that he kept putting himself to bed extra early. I certainly had no complaints.

Catherine and her Matthew (whom we dubbed "the big Matthew" in order to distinguish him from our Matthew) arrived bright and early on Saturday morning and brought the sun and some really warm weather. Catherine and I ducked out briefly for some sister time while Matthew entertained the big Matthew with Paul and Emma. Then, we proceeded to finalize our Easter preparations by doing the usual egg decorating session. Matthew loved decorating the eggs with Aunt Catherine and the big Matthew. He had been looking forward to that activity for weeks. He was much better at it than his Aunt - poor Catherine cracked (smashed is more like it) every egg she tried to dye. We fired her before she could crack all the eggs and put her in charge of making the egg stands. And I have to say she was excellent at that.

Baby Emma is just in awe of the egg-dying activities.

Apparently it's a genetic thing.

Aunt Catherine! You were banished from touching the eggs, remember!?!?


Matthew takes over the dying. Notice Catherine is adjusting to her new job as egg-stand maker.

Oh yeah. These are so gorgeous - so unique, such beautiful designs, such original colors. We're a talented family.

We attended the 7:30 AM Easter morning Mass at our parish. Of course this meant that we were all up by pretty much 5:30 AM to try to get everyone beautified in time for Mass - and we still arrived with barely a second to spare. Matthew was very well behaved at Mass. Threats of having his Easter candy privileges revoked should he misbehave might have had something to do with that. Emma was great right through the homily. This was so out of character for her, that I leaned over and whispered to Paul: "Wow...she's being so darn good. It feels great to sit together again!" She must have heard me because then she started doing her usual routine of grunting, groaning, and flailing until one of us took her to the back. It was great while it lasted.

Paul with his pretty little girl.

Brushing her hair - so very young yet oh so vain!

And this is Matthew - completely upset that I took away Angry Birds from him because it was time to go to Mass. This was seconds before I threatened to cancel the egg hunt. He shaped up quickly.

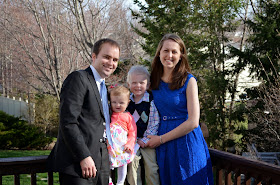
After arriving back home, we took some really quick family pictures on our back porch. Seriously, this photo session was probably about 2 minutes long. It was freezing outside. And the children were getting anxious for some Easter treats. And by "children" I pretty much just mean Matthew.

Our little family of four!
I just love this guy.
Little Matthew's face just cracks me up so much in this picture. He loves his Aunt Catherine.
Love Birds. Catherine, you better start working on your Spanish since
your last name is soon to be Ortiz.
"Sisters, Sisters. There were never such devoted sisters!"

Everyone dressed down and then we banished little Matthew to the office while big Matthew and Paul stuffed some plastic eggs with jellybeans and then scattered them around the house and yard. Then, the hunt began! Matthew was obnoxiously excited to finally go egg hunting.

We spent the rest of the morning stuffing ourselves with Smoked Salmon Deviled Eggs, Blueberry Buckle, and fresh pineapple. Little Matthew and Emma ate probably about two pounds of chocolate (it was seriously disgusting how much sugar they inhaled between the two of them) as their breakfast. Since we all were feeling a little lethargic, Paul and I hustled everyone out of the house for a long hike while our pork rib roast slowly cooked. We meandered through the woods, skipped rocks, and chatted for a couple of hours - just enough time to not feel quite so stuffed from breakfast and ready ourselves for Easter dinner! It was so warm and beautiful outside - the first time in a long while that we had weather this beautiful for Easter Sunday!

Upon arriving home, we put the final touches on Easter dinner and then sat down to eat again. By the time our meal was over, our poor guests were complaining about how full they were and how they had to take off to start the long trek back home. Then Paul reminded them about the Carrot Cake Cheesecake sitting in the fridge and I think they about died. But they managed (somehow) to finish off a slice before packing up, saying goodbye, and heading out. Matthew was so sad to see Aunt Catherine go that he refused to say goodbye. He might have also been a bit exhausted - he passed out for the night immediately after they left (around 5:00 PM).

So excited to start finding eggs!

"I can't reach it!"

And this mysterious hand is coming to the rescue!

I think the Easter bunny enjoyed hiding eggs out of Matthew's reach.


Ah-HA! I see CANDY!

Fighting over spilled candy. All in the spirit of Easter.

I think she choked on that jelly bean shortly after this picture was taken.
Lesson learned - no more jelly beans for Emma!


Loving the outdoors on this beautiful Easter morning!

The eggs have finally all been found! (At least I think that's why everyone but little Matthew looks so happy!)

Emma received a stuffed bunny in her Easter bucket.
She kept hugging it while saying "Hiya" in a high-pitched voice. She likes animals.

Overall, it was a lovely day spent with family enjoying good food and conversation. Everyone enjoyed the food but I have to say that my favorite dish of the day was the Smoked Salmon Deviled Eggs. While growing up, my family always served a coffeecake of sorts for Easter brunch along with the hard-boiled eggs we had dyed the day before. We normally cracked the eggs and ate them plainly with salt and pepper. Paul really hates straight up hard-boiled eggs, although he loves them in things like Egg Salad or Deviled Eggs. Since he is so darn picky, we decided to make deviled eggs to serve alongside the Blueberry Buckle. But we did not stop there - we decided to make them fancy by adding chopped smoked salmon, capers, and chives. Catherine was very skeptical when she saw me preparing the salmon for the eggs. She told me how she had tried smoked salmon for the first time at a cafe in Paris and had almost thrown up after taking a large bite. She had expected it to be warm and was very much disturbed by how "slimy" it was. I assured her that she would like it in the eggs just fine.

Sure enough, everyone adored these deviled eggs. They were so good. The salmon and capers add some briny, salty flavors to the eggs while the chives lend a freshness. They were pretty filling, yet none of us could stop eating them. Paul was especially wild about them - he loves smoked salmon. I can't wait to make them again!


Smoked Salmon Deviled Eggs
adapted from The Barefoot Contessa

10-12 large hard boiled eggs
1/2 cup sour cream
2 ounces cream cheese, at room temperature
2 tablespoons mayonnaise
1 tablespoon freshly squeezed lemon juice
2 tablespoons minced fresh chives, plus extra for garnish
6 ounces smoked salmon, minced
Pinch of Salt
1/2 teaspoon freshly ground black pepper
Capers, drained, for garnish


Peel the eggs and then slice them in half lengthwise. Remove the yolks carefully. Place the yolks in the bowl of an electric mixer fitted with the paddle attachment and arrange the whites on a platter in a single layer with the cut sides up and sprinkle with salt.

To the egg yolks, add the sour cream, cream cheese, mayonnaise, lemon juice, chives, salmon, salt, and pepper. Beat on medium speed until fluffy. With a small spoon, fill the egg whites with the egg yolk mixture. Cover loosely with plastic wrap and refrigerate for 30 minutes for the flavors to blend.

When ready to serve, garnish with the capers and some extra chopped chives.

Thursday, April 17, 2014

Sweet Potato Salad with Bacon and Apples


Warning: This is probably the most disjointed blog post ever.

My sister and her fiance are spending Easter weekend with us and I have been trying to assemble the menu based around all of our tastes and preferences. I thought I had everything planned out, right down to a fantastic strawberry-rhubarb cobbler for dessert, when my sister dropped a bombshell on me: "Eww. Monica, I hate strawberries."

Who in heaven's name hates strawberries?

This revelation blew my mind - how did I not know that Catherine can't stand strawberries? Her aversion is especially perplexing when juxtaposed with the tastes of one of our other sisters, Sophie, who went through a 6-year-long strawberry obsession. Everything she ate had to be strawberry-themed. It didn't matter if it was artificially flavored or not (she was famous for sneaking boxes of the strawberry Frosted Mini-Wheats into the cart while grocery shopping with the parents). She doodled strawberries during class, she dreamed of strawberries, and I think her email address was something along the lines of "StrawberryLuverXOXO."

Sophie dreaming about lying among strawberry fields. Forever.

Bottom line is that I believe Sophie's fanatical love of strawberries to be slightly more normal than Catherine's full out hatred of them. What is it that she does not like? Is it the juicy deliciousness? The pure, unadulterated sweet flavor? The antioxidants that lower risk of heart and neurological disease? What is it Catherine?!?

The strawberry hater is on the left. The baby and myself happen to be strawberry lovers.

No worries, the strawberries have been banished from our Easter menu. But I refuse to make "leg of lamb" per Catherine's request. I have an aversion to eating anything that was once fluffy.

Our Easter dinner menu will be as follows:

Pork Rib Roast with Port-Wine Cherry Sauce
French-Style Potato Salad with Herbs
Spinach Salad with Grapes, Pears, Pistachios, and Sherry-Shallot Vinaigrettte
Cream Biscuits
Carrot Cake Cheesecake for dessert
Ice Cream (Paul/Matthew insist upon it!)

You're welcome, Catherine.

***

Since ham is traditionally served as part of the Easter feast, I'm sure that potato salad will be a featured side on more than one dinner table come Sunday. This recipe shakes things up a bit by employing sweet potatoes tossed in a light mustard vinaigrette instead of the traditional mayonnaise-laden version featuring russets, baby red, or Yukon gold potatoes. The sweet potatoes are roasted until just tender and then tossed while still warm in a hot mustard-vinegar mixture. After allowing those flavors to meld and absorb, the salad is rounded out with the addition of chopped bacon, diced sweet apples, and olive oil. Eat it as is as a side dish to complement ham, pork roast, or turkey or serve it over a bed of baby spinach (tossed with a little extra vinaigrette from the potato salad) as a spectacular main dish. This has been my lunch every day this week and I have not tired of it! It's so fresh, healthy, and filling!

I did not add them this time, but I'm thinking some chopped, toasted pecans or dried cranberries would be a welcome addition to this salad.

Our entire family enjoyed this dish and I'm sure you will too! While nothing can take the place of my Mom's potato salad recipe (especially alongside her honey-glazed ham), this is a great, healthy, and different version. Paul and Matthew were happy there was bacon, Emma loves her sweet potatoes, and I am just thankful to see them all eating something relatively healthy without complaint.


Sweet Potato Salad with Bacon and Apples
adapted from Cook's Country

2 pounds sweet potatoes, peeled and cut into 3/4-inch cubes
5 slices of bacon, chopped
2 sweet apples (like Braeburn, Jonagold, or Honeycrisp), peeled, cored, and chopped into 1/2 inch pieces
2 teaspoons lemon juice
1/4 cup finely diced red onion
4 tablespoons cider vinegar
2 tablespoons Dijon mustard
1/2 teaspoon salt
1/4 teaspoon pepper
3 tablespoons Extra-Virgin Olive Oil

Preheat the oven to 400 degrees.

Toss the sweet potatoes with a tablespoon of olive oil and season with salt and pepper to taste. Spread evenly on a foil-lined baking sheet and roast for about 12-15 minutes, or just until the potatoes can be pierced with a fork.Keep an eye on them and be sure not to roast them too long or the salad will be mushy. Remove from the oven and carefully place the potatoes in a large bowl.

Combine the vinegar and mustard in a bowl with the 1/2 teaspoon salt and 1/4 teaspoon pepper. Divide in half and microwave half of the vinegar mixture on high for about 30 seconds, or until piping hot. Immediately drizzle over the warm potatoes and gently fold everything together with a rubber spatula. Let stand for about 15 minutes at room temperature.

Meanwhile, toss the apple pieces with the lemon juice in a small bowl.

Cook the bacon in a saucepan over medium heat until crispy. Drain on paper towels.

With the remaining vinegar mixture, slowly add in 3 tablespoons of olive oil  as you whisk. Continue whisking until emulsified. Add the apple, diced onion, and bacon to the bowl with the sweet potatoes. Add the vinaigrette and gently toss to combine. Refrigerate for about 30 minutes before serving. The salad can be made up to 2 days in advance.

Enjoy!

Tuesday, April 15, 2014

TWD: Cantuccini with Dark Chocolate and Coconut


When Paul and I were first married, we lived in a two bedroom town home that shared a wall, a porch and a walkway with our neighbors, an elderly couple and their yappy Yorkie. Money was very tight and although we liked the idea of subscribing to the daily paper we chose to forgo doing so in order to save a couple of extra dollars each week. However, one Sunday after returning home from the early Mass, we were delighted to see a big, fat newspaper stuffed with ads sitting on our front porch. The news-people must have dropped us a free paper in an attempt to entice us to subscribe! We snatched up the paper and headed inside to enjoy a breakfast of scrambled eggs and hot coffee while leisurely looking over the news articles and perusing the shopping ads. We enjoyed it so much that we actually considered subscribing just to the Sunday paper, but our practical sides won out and we resisted temptation. However, the next week we were happy to find a Sunday paper sitting on our stoop once again. We did not question it and took it inside to enjoy once more. The following week, the paper showed up again. By then, we thought that perhaps our "free trial" was supposed to last a whole month and resolved to simply enjoy the paper for as long as it continued to come to us. 


Later that same week, I was outside collecting the mail when our neighbor walked outside and began to chat with me. We briefly discussed a story that had been in the news recently when my neighbor offhandedly mentioned: "Speaking of the news, I have had the hardest time getting the paper boy to deliver our Sunday paper. It's been missing the past few weeks."

Oops.

Remember how I said that we shared a front porch with our neighbors? Apparently the newspaper boy dropped the Sunday paper off a little closer to our door than their door and we erroneously thought it was for us. We had been stealing the neighbors' paper for weeks! I'm pretty sure they already disliked us, so this would certainly kill any chance of us being invited over for a dinner party.

We just quietly stopped stealing their paper and went back to enjoying our Sunday mornings without it. How does this story relate to this week's Tuesdays with Dorie challenge? Not really at all, but for some reason in the process of making these delightful cookies, this memory popped into my head. Maybe it was the fact that these cantuccini, a classical recipe Tuscan recipe for the more ubiquitous biscotti, pair so perfectly with a hot mug of coffee - just like a Sunday morning paper. Unlike biscotti, the cantuccini do not incorporate butter or oil into the batter, using only the fat found in the eggs to flavor and enhance the dough. They bake up extra-crispy and crunchy - the perfect texture for dunking.


I omitted the almonds called for in the original recipe and instead added 3/4 cup chopped bittersweet chocolate and 1 cup shredded coconut to make a flavor reminiscent of an almond joy. Thankfully, these come together very quickly and easily. I made them while barely awake at 6:15 AM on a Saturday morning because the children refused to let me sleep in at all. I got them back later in the day by putting them to bed a whopping two hours early.

Emma found them to be the perfect teething cookie. Paul thought these were great with coffee or chai. Matthew just likes any excuse to eat cookies for breakfast. Either way, this is a great recipe!


Cantuccini with Dark Chocolate and Coconut
adapted from Baking with Julia

2 cups flour
1 cup sugar
2 teaspoons baking powder
1/2 teaspoon cinnamon
1/4 teaspoon salt
1 cup sweetened shredded coconut
3/4 cup finely chopped bittersweet chocolate
3 large eggs
1 tablespoon vanilla extract

Preheat the oven to 350 degrees.

Whisk together the flour, sugar, baking powder, cinnamon, and salt. Toss with the coconut and chocolate. In a separate bowl, beat together the eggs and vanilla. Add to the flour mixture, stirring with a wooden spoon until a dough comes together. Turn out the dough onto a floured surface and knead together into a ball. Divide the dough in half and shape each half into a 12-inch long log. Transfer the logs to a parchment-lined baking sheet.

Bake in the preheated oven for 30 minutes, or until brown and firm. Remove from the oven and transfer the logs from the baking sheet to a wire rack to cool completely. Leave the oven on.

Once cool, cut cross-wise into 1/4-inch thick slices. Using the same baking sheet as before, lay the cantuccini cut side down on the baking sheet and return to the oven for about 10-15 additional minutes, or until browned and firm. Enjoy with coffee or tea!